
“`html
What Causes Wood Grain to Raise After Staining
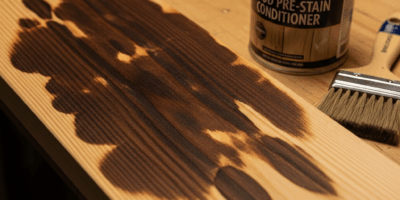
Wood grain raising after stain application is genuinely frustrating. I’ve stood in my workshop staring at perfectly smooth walnut that suddenly felt like 80-grit sandpaper once the stain dried. Here’s what’s actually happening: wood fibers are hygroscopic — they absorb and release moisture based on humidity and liquid contact. When you apply stain, whether oil-based or water-based, those fibers absorb moisture, swell slightly, and then as the stain dries, the surface fibers dry faster than subsurface ones. This uneven drying causes those fibers to stand up perpendicular to the wood surface, creating that rough texture.
The key detail most people miss: this happens even on properly sanded surfaces. A 220-grit finish won’t prevent it. The issue isn’t inadequate sanding — it’s the fundamental reaction of wood to liquid. Water-based stains and dyes trigger this more aggressively than oil-based products because they contain higher water content. The worst part? You don’t see the raised grain until the stain has fully cured, usually 24 to 48 hours later, depending on temperature and humidity.
How to Prevent Grain Raising Before You Stain
Prevention absolutely beats repair, and the most effective method is the wet-raise technique. I learned this the hard way after ruining a red oak dresser in 2019. That experience changed everything about how I prep wood.
The Wet-Raise Method
Start with your wood already sanded to 150-grit. Dampen the entire surface with distilled water using a sponge or spray bottle — you want it wet but not dripping. Use just enough water so the grain lifts evenly without pooling. This takes maybe 30 seconds per square foot. Let it dry completely, ideally in a low-humidity environment, below 50% RH if possible. This usually takes 4 to 6 hours, but overnight is safer.
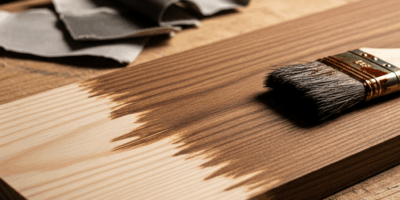
Once dry, those raised fibers are now part of the surface. Sand them off with 220-grit or 240-grit sandpaper. Light passes only — you’re not resurfacing, just removing the whiskers. Sand with the grain, and apply minimal pressure. You’ll see dust that feels almost talc-like. That’s the lifted fibers coming off. Stop when the surface feels smooth again. This single extra step eliminates 85% of grain-raising problems with water-based stains.
Grit Progression and Timing
Your sanding sequence matters more than people realize. I typically progress 80-120-150-220, spending roughly equal time at each stage. Skip grits — jumping from 80 straight to 220 — and you trap dust in scratches that stain highlights later. Between each grit, vacuum thoroughly and wipe with a tack cloth.
Drying time between stages is critical. If you sand, stain immediately, and the wood hasn’t fully equilibrated to room humidity, you’re asking for trouble. I wait at least 2 hours after the final sand before staining. Better still, wait overnight. Your wood should feel dry to the touch and sound slightly hollow if you tap it — that’s your cue it’s ready.
Humidity Management During Prep
Work in a controlled environment if you can. Humidity between 40% and 55% is ideal. If your shop runs at 70% humidity in summer, grain raising becomes nearly inevitable with water-based products. A cheap digital hygrometer from Amazon runs $12-15 and tells you exactly where you stand. If humidity is climbing, open windows or run a dehumidifier before sanding.
Stain Type Selection
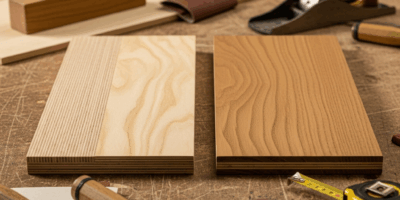
Oil-based stains raise grain far less than water-based because they contain minimal water. If you’re working with problematic wood like oak or ash — woods with pronounced grain — consider 100% oil-based stains or gel stains. Minwax Gel Stain and Varathane Gel Stain both minimize raising because they’re thicker and absorb more slowly. The trade-off is lower color penetration and a slightly more surface-level finish, but the payoff is worth it on grain-prone species.
Fixing Raised Grain After Stain Has Dried
Probably should have opened with this section, honestly. Some of you are already past prevention. Here’s what to do if the grain is already up.
Light Sanding Between Coats
If you’re applying multiple stain coats, don’t skip the intermediate sanding. After the first coat dries completely, use 220-grit or 240-grit to knock down the raised fibers. Sand parallel to the grain, not across it. Circular motions will expose fresh wood and create blotchy patches that take stain unevenly. Straight strokes following the grain direction are mandatory.
Sand lightly enough that you’re removing the fuzzy texture without cutting back into the color. You should see no color change — only a slight dulling as the stain dust comes off. If you’re removing color, you’re sanding too hard. Most raised grain requires maybe 30 seconds of light contact per square foot.
Strategic Recoating
If you’re at the first coat and the grain is already raised but acceptable, you have options. Option one: sand it down and apply a second coat of the same stain. This fills the grain with additional color and deposits more pigment in those now-smoothed fibers. Option two: switch to a gel stain for subsequent coats. Gel sits on the surface more and won’t re-raise the grain as aggressively as liquid stain would.
The safest play is waiting between coats. First coat dries and grain raises. Sand it smooth. Wait 24 hours. Apply the second coat. This rhythm prevents compound grain raising where each new coat triggers another lift.
Avoiding Over-Sanding and Raw Spots
The mistake I made on a cherry cabinet in 2021 was sanding too aggressively after the first stain coat. I exposed raw wood patches because I’d pressed too hard, and stain wouldn’t blend back in once those spots were exposed. Sand with your fingers doing the pressure work, not your arm. Your hand should barely feel the sandpaper moving. If you can feel resistance, ease up immediately. Don’t make my mistake.
When You Should Strip and Start Over
Not every raised-grain situation is salvageable. If the grain is unevenly distributed — some areas smooth, others deeply raised — you’ve likely got uneven wood or moisture absorption issues that sanding won’t fix. If grain raising is severe enough that sanding would remove all the stain color in affected areas, you’re looking at an unfinished project.
Here’s my decision rule: if more than 20% of the surface has prominent raised grain after the first coat, strip it. You’ll spend 3-4 hours stripping anyway, but you’ll spend 6-8 hours trying to blend a partial fix. Minwax Wood Stripper runs $8-12 per quart and works efficiently on most stains. Strip, resand with the wet-raise method this time, and start fresh. It’s honestly less frustrating than trying to rescue a compromised finish.
Best Practices for Your Next Project
Use this sequence for consistent results: sand to 150-grit with standard progression, wet-raise with distilled water, dry completely, sand with 220-grit, wait 24 hours, apply stain, wait 48 hours for full cure, sand with 240-grit between coats, apply second coat if desired, final cure before topcoating.
Track your conditions. Note the humidity, temperature, and wood species on every project. Oak and ash raise grain more than maple or walnut. Water-based stains require the wet-raise method; oil-based usually don’t. Gel stains skip the issue almost entirely. Over time, you’ll recognize which combinations cause problems in your specific environment.
The checklist: proper grit sequence, adequate drying between stages, humidity monitoring, wet-raising for water-based products, light sanding between coats, and patience. Grain raising isn’t a finish-destroying disaster — it’s a solvable problem that good prep work makes nearly disappear.
“`

Stay in the loop
Get the latest classic custom wood furniture updates delivered to your inbox.