“`html
Why Wood Stain Goes Darker Than the Can Sample
Standing in my garage with a piece of scrap wood that looks nothing like the color swatch on the stain can — that’s become a ritual for me. Wood stain color too dark after first coat hits different when you’re three hours into refinishing a dresser and the grain suddenly looks like mahogany instead of honey oak. I’ve learned why this keeps happening.
That tiny wood sample glued to the can lid has been sitting in controlled conditions, possibly for months. Fluorescent warehouse lighting, who knows what kind of air exposure. But here’s the real issue — it’s a different species than what you’re actually staining. The can manufacturer picked whatever was convenient.
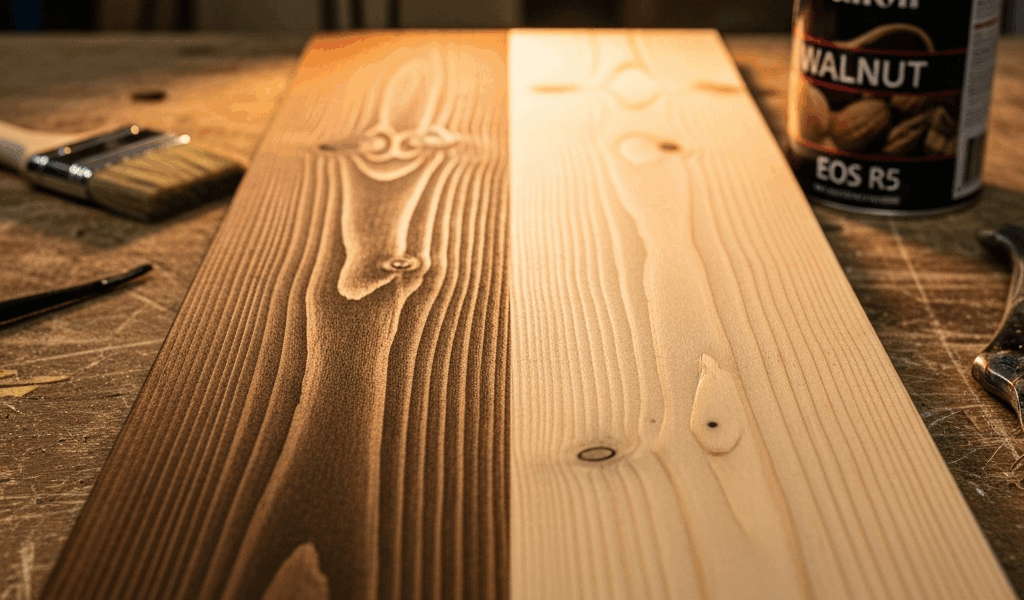
Wood absorption varies wildly. Pine? Basically a sponge. Oak has larger, more defined pores that seem to drink stain like it’s going out of style. Walnut already carries its own dark undertone. When you brush stain onto these different woods, the pigment penetrates at different rates and depths. A medium walnut stain on red oak will look substantially darker than the same stain on pine because oak’s cellular structure allows deeper penetration. The grain direction matters too — end grain absorbs stain three times faster than face grain, which is why the ends of your boards always look darker.
I learned this the hard way. Pine nightstand, “natural” stain, expecting light honey tones. Pine absorbed it so aggressively that I ended up with something closer to butterscotch. The can sample? Probably oak or poplar underneath all along.
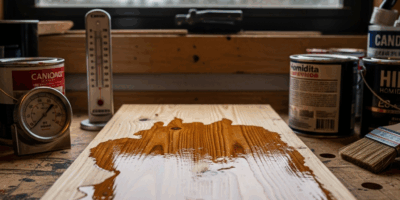
Temperature and humidity also play roles most people ignore entirely. Your workshop at 65°F and 40% humidity is different from 72°F and 55% humidity. Drying times shift. Slower drying means longer contact time between stain and wood — longer contact equals darker color. It’s not complicated, just easy to overlook.
How to Lighten Stain That’s Too Dark Right Now
Looking at stain that’s already on your wood? Options exist. They’re not perfect. But they work if you move quickly.
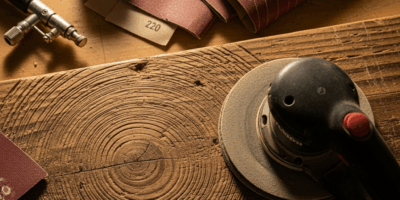
Light sanding with 150-grit paper is your first move if the stain is still wet or barely dried. Use a sanding sponge or palm sander on low speed — you’re not trying to strip the wood, just disturb the stain layer. You’ll pull some stain back out of the grain. This typically lightens the final color by 15-25% depending on how aggressive you get. The catch: you need to do this within the first 2-4 hours, before the stain fully cures into the wood fibers. After that window closes, you’re fighting an uphill battle.
Once it’s bone dry — 24 hours minimum — sanding becomes less effective because the stain has chemically bonded to the wood. You can still sand, but you’re working harder for less result.
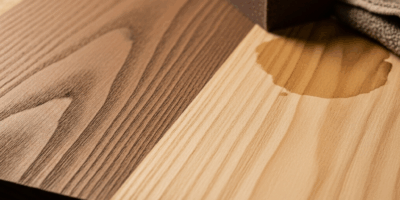
Mineral spirits wipe-down works on oil-based stains if you catch them early. This won’t reverse the color, but it can redistribute pigment and prevent additional darkening. Dampen a rag with mineral spirits and wipe the surface gently — more of a damage-control move than a solution.
Stain reducer or thinner applied to a fresh coat can lighten it before you apply over the dark layer. You’re essentially applying a lighter version on top. Mineral spirits for oil stain, water for water-based — specific to your stain type. This works partially because the new coat sits on top of the dried stain. Fair warning: drying time extends by 4-6 hours because you’ve added solvents back into the mix.
Testing on a sample board is critical now. Use offcuts of the exact same wood species and apply your lightening technique. This tells you whether you’ll get acceptable results before touching your actual piece.
What doesn’t work: polyurethane won’t lighten dark stain. Neither will more coats of clear finish. Once stain is in the wood, the only real removal is sanding back to bare wood — which defeats the purpose if you’ve already spent hours on staining.
Preventing Dark Stain Buildup on Future Projects
Probably should have opened with this section, honestly. Prevention is infinitely easier than fixing.
Wood conditioner application is the single biggest difference-maker I’ve found. Minwax Wood Conditioner runs roughly $6-8 per quart and goes on before stain to create a barrier that equalizes absorption across the wood surface. This prevents end grain and softer areas from going darker. Apply it, wait 15 minutes, wipe it off. Drying time is only 30 minutes before staining. It costs almost nothing and eliminates the blotchy, overly-dark problem in 80% of cases.
I skipped conditioner on my first ten projects. I regret it entirely. The results improved dramatically once I started using it.
Thin coats instead of heavy coats is obvious in theory, brutal in practice. One thin coat dries faster, penetrates more evenly, and can always be darkened with a second coat if needed. A single heavy coat is permanent darkness. Apply stain with long, even strokes — one coat, wait the full drying time, then assess before considering a second. Oil-based stains typically need 4-8 hours, water-based stains 3-6 hours, depending on temperature and wood type.
Test boards are non-negotiable. Cut scrap pieces from the same lumber batch as your actual project. Apply wood conditioner and stain using the exact technique you’ll use on the piece. Let them dry completely — 24 hours minimum. This is the only honest way to know how the stain will look on your specific wood. The $2 in scrap wood prevents the $200 mistake on your actual project.
Brush or rag technique matters. A brush distributes stain more evenly than a rag but requires a lighter hand — rags pool stain in certain areas. Quality 2-3 inch brushes designed for stain give more control, whether synthetic or natural bristles. Whatever you use, maintain a wet edge to prevent lap marks and uneven absorption.
When You Should Just Accept the Dark Color
Sometimes the wood and stain combination just goes dark. Walnut stain on red oak? That’s going to be pretty dark no matter what you do. Some species and stain combos are incompatible with lighter results.
Dark isn’t bad, though. Dark is elegant. Dark is sophisticated. Dark hides dust and fingerprints better than medium tones — that’s just physics.
If your stain ended up darker than planned but it’s not actively wrong — like you’re not turning your farmhouse dresser into a medieval dungeon piece — consider design pivots instead of reversal. Dark wood benefits from light hardware. Brushed brass or chrome pulls create contrast. Lighter trim or paint on nearby pieces balances the darkness. A dark-stained table can anchor a room if paired with intentional styling.
Here’s what I’ve noticed: if you’ve spent hours staining something, your eye gets fatigued and overestimates the darkness. Come back to the piece after a day away. Your actual impression might shift. I’ve abandoned lightening attempts on pieces that looked fine after I stopped staring at them.
Fight the color only if it’s genuinely wrong — like you aimed for light oak and got espresso. Otherwise, accept it and style around it.
Stain Darkness Expectations by Wood Type
Pine absorbs aggressively and reads darker than the can sample predicts. Pine is soft, has minimal grain definition, and takes stain deeply and somewhat unevenly without conditioner. Expect 20-30% darker than the swatch. Walnut stain on pine becomes nearly black. Natural or honey stains read as medium brown — darker than you’d think.
Oak (red or white) has large pores and medium absorption. Oak tends to go darker than the sample but not as aggressively as pine. You’ll see the grain pattern clearly, which can create the illusion of darkness even if the overall color is accurate. Moisture content in freshly milled oak affects this — kiln-dried oak, which is most lumber yard stock, stains lighter than freshly cut oak with high moisture.
Walnut already contains natural dark tannins. Any stain, even “natural” or “light” versions, will look darker on walnut than on lighter woods. Walnut stain on walnut can approach black if you’re not careful. Walnut takes conditioner well and benefits from thin applications.
Maple is dense and doesn’t absorb stain as readily as oak or pine. Maple stays closer to the can sample color, which is honestly refreshing. Hard maple takes longer to stain — you may need extended drying times, add 2-3 hours to manufacturer times, because the stain sits on the surface longer before absorption.
Birch falls between maple and oak in absorption. Birch grain is subtle, so you won’t get the dramatic grain contrast that oak provides. Stain tends to look more uniform across the board, which can appear darker because there’s no lighter grain variation breaking up the color. Birch rarely needs conditioner unless it’s plywood or edge-banded veneer.
Wood moisture content is the variable most people miss entirely. Wood at 8% moisture content, typical kiln-dried lumber, stains differently than wood at 12% moisture. Higher moisture slows stain absorption and can change final color. Store your lumber in your workspace for a few days before staining so it acclimates to your shop’s humidity — this alone prevents color surprises.
“`

Stay in the loop
Get the latest classic custom wood furniture updates delivered to your inbox.