Why Pine Blotches When You Stain It
Pine staining has gotten complicated with all the conflicting advice flying around. Use this stain, try that conditioner, sand more, sand less — everyone has an opinion. But after ruining a pine bookshelf at 11 p.m. on a Tuesday (standing in my garage, staring at what looked like someone had spilled cold coffee across the whole thing), I learned everything there is to know about why pine behaves the way it does. Today, I’ll share it all with you.
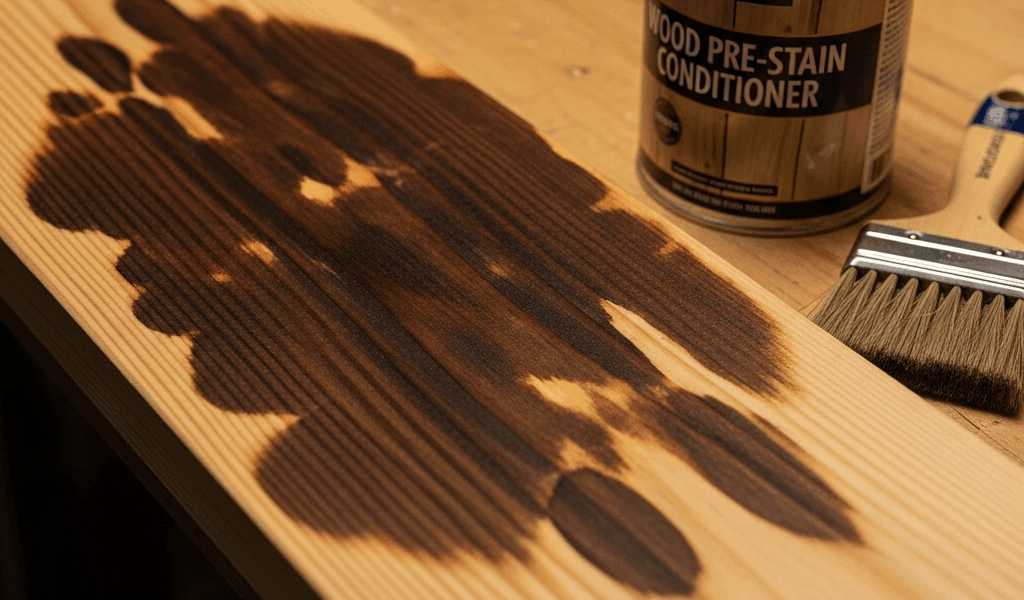
But what is pine blotching, exactly? In essence, it’s uneven stain absorption that creates dark, splotchy patches across the wood surface. But it’s much more than that — it’s actually baked into pine’s biology, which is what makes it so maddening when you don’t know what you’re dealing with.
Pine’s grain structure is genuinely different from hardwoods like oak or walnut. Inside each growth ring, you’ve got earlywood — soft, low-density material that forms during the growing season — sitting right next to latewood, which is tight and hard. These two materials absorb stain at completely different rates. The earlywood soaks it up like a dry sponge. The latewood practically repels it. The result is those dark, blotchy patches that make a careful stain job look like an accident.
A quarter-inch of movement across the grain can mean the difference between a porous ring and a dense one. Stain particles sink deep into soft grain, creating concentrated dark color. On dense grain, they sit right on top, leaving lighter spots. The visual result is chaos — and that’s what makes pine so endearing to us woodworkers who refuse to give up on it.
The good news: this is completely predictable. And completely fixable. So, without further ado, let’s dive in.
Stop Blotching Before It Starts With Pre-Stain Conditioner
Pre-stain wood conditioner is not some fancy upsell at the hardware store. On pine, it’s the foundation of the whole operation. What it does is seal the softer earlywood just enough to slow absorption down, while still letting the latewood accept color. Even penetration across the whole surface — that’s the goal.
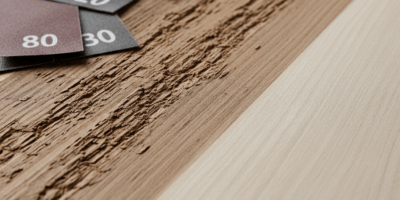
While you won’t need a full workshop setup, you will need a handful of supplies before you start. A clean, sanded surface is non-negotiable — 120-grit or 150-grit for your final sand is standard. Wipe down every bit of dust with a tack cloth afterward. Even a thin dust layer will block the conditioner from doing its job. Don’t make my mistake and skip that step thinking it won’t matter. It matters.
For the conditioner itself, I’m apparently particular about brands — Minwax Pre-Stain Wood Conditioner works for me on oil-based stains (around $6–8 for a quart at most hardware stores), while the General Finishes Water-Based Wood Conditioner ($12–15 per quart) is what I reach for with water-based work. Apply a thin, even coat using a brush or foam applicator. Light and even is the goal — not heavy, not rushed. Work in sections about 12 inches wide, stay wet, and blend as you go. No drips. No puddles.
Here’s where timing matters more than most people realize. Different conditioners have different windows, and this is not flexible:
- Minwax Pre-Stain: typically 15 minutes before staining
- General Finishes Water-Based: usually 30 minutes before staining
- Always check your specific product label — seriously, always
Wait too long and the conditioner dries completely, which defeats the whole purpose. Wait too short and the grain hasn’t sealed properly. Set a timer on your phone. This one detail changes everything about how your stain lays down.
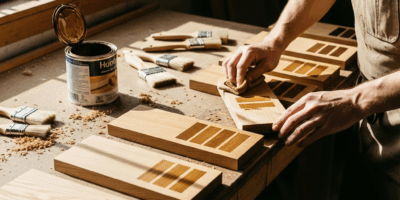
After the conditioner hits its specified window, you stain normally. The work is already done at that point. I’ve used this approach on pine furniture, pine trim, pine shelving — the improvement is dramatic every single time. Blotching drops from inevitable to virtually nonexistent.
Gel Stain as a Blotch-Proof Alternative
Gel stain works on a completely different principle — and honestly, it’s the first thing I recommend to anyone who just wants the problem to go away without thinking too hard about it.
Instead of soaking into the wood, gel stain sits on the surface like a thick paste. Almost like yogurt, if you’ve never opened a can of the stuff before. You don’t pour it or brush it on like liquid stain. You dab it. Work in small sections — roughly 12 by 12 inches — and spread the gel evenly with a foam applicator or lint-free cloth. You’re coating the surface, not trying to push stain into it. That distinction matters more than you’d expect.
Varathane Gel Stain runs around $8–10 per pint and is available at basically every big-box hardware store. Minwax Gel Stain is equally easy to find. Apply in thin, even layers. Let it sit for 5 to 15 minutes depending on the brand — the can will tell you — then wipe off the excess with a clean cloth. What stays behind is your color.
First, you should know about one honest advantage — at least if you’re working on furniture pieces — gel stain also provides a slight degree of surface protection, almost like a very light topcoat built in. Liquid stain always needs a topcoat after. Gel stain can technically stand alone, though polyurethane over the top is still smart for anything that sees real use.
The trade-off is that gel stain doesn’t penetrate as deeply, so the color reads slightly differently — sometimes more uniform, occasionally a little less warm. On pine, though, that trade-off is completely worth it. A blotch-free finish beats a theoretically richer color every single time.
How to Fix Blotching That Already Happened
Probably should have opened with this section, honestly. A lot of people reading this are already standing in their garage staring at a blotchy pine disaster and looking for answers fast.
Your options depend on how bad things got and how much you’re willing to put in to fix it.
Option 1: The Light Rescue
If blotching is minor — a few darker patches but the piece isn’t ruined — you can attempt recovery without stripping everything. Sand very lightly with 180-grit or 220-grit, just enough to dull the surface. Wipe clean. Apply pre-stain conditioner, wait the full specified time, then apply a second coat of your original stain or switch to gel stain. This evens out color and reduces blotching noticeably. Works roughly 60% of the time on minor cases — not a guarantee, but worth trying before committing to a full strip.
Option 2: Toner Coat
If blotching is significant but the overall color direction is one you like, try a toner. Mix a very small amount of stain diluted with mineral spirits for oil-based, or water for water-based, and brush or wipe it over the whole piece. The goal isn’t adding more color — it’s evening out what’s already there. One very light coat can surprise you. This requires a lighter hand than regular staining, so go slow.
Option 3: Embrace the Darker Path
Frustrated by severe blotching that no light fix will touch, a lot of woodworkers end up going darker — and it works. Apply one or two coats of gel stain in a deeper shade over the entire piece. Because gel stain sits on the surface, it covers inconsistencies and creates uniformity. Dark walnut reads as intentional. Light golden oak looks like an accident. Darker almost always wins when you’re in rescue mode.
Option 4: Full Strip and Restart
If the piece is small or you need it to be right, sand the stain off completely and start over using the conditioner method. Time-intensive — we’re talking several hours minimum on anything larger than a small shelf. But it guarantees results and removes all the guesswork.
Choosing the Right Stain and Finish for Pine Projects
Not all stains behave the same on pine. Oil-based stains tend to blotch worst — they penetrate deeply and fast, and they dry slowly enough that blotching has time to really set in. That said, oil-based stains paired with a proper pre-stain conditioner work beautifully. That’s not a contradiction, just a process requirement.
Water-based stains dry faster and are slightly more forgiving on pine overall — but they can raise the grain if you skip the fine sanding step. Sand to 150-grit or finer before applying water-based stain. That was a $40 lesson on a pine side table back in 2019. Learn from it.
Gel stains skip most of these headaches entirely. They’re naturally blotch-resistant on pine — no conditioner required, though using one doesn’t hurt.
For furniture pieces, the conditioner-plus-oil-based-stain approach is time-tested and reliable. For trim work where quick turnaround matters, gel stain saves time and stress. For flooring, you’ll want something more durable — typically oil-based stain with pre-conditioner followed by a polyurethane topcoat, minimum two coats.
The pine blotching problem is real. But it’s also solved. Use conditioner, consider gel stain, and you’ll skip the frustration entirely — or at least know exactly how to fix it when things go sideways.

Stay in the loop
Get the latest classic custom wood furniture updates delivered to your inbox.