Why Wood Glue Joints Fail After Drying
Wood glue joints have gotten complicated with all the misinformation flying around. Everyone blames the glue brand, the wood species, the weather — and yeah, those things matter sometimes. But rarely in the way people think. As someone who’s rebuilt failed joints and traced them back to their actual source, I learned everything there is to know about why glued wood separates. Today, I will share it all with you.
There are really four or five failure modes that cover nearly every joint separation I’ve seen in my shop:
- Poor surface preparation — dust, oils, or mill glaze blocking adhesion
- Insufficient or uneven clamping pressure
- Exceeding the glue’s open time before full seating
- Wood movement after cure from humidity or temperature swings
- Wrong glue choice for the wood species or joint type
Most DIYers fix one thing, blame themselves, and move on. The real work is walking through each failure mode systematically — at least if you actually want the fix to last. That’s what separates a one-time patch from genuine understanding.
Step 1 — Check Your Surfaces Before Blaming the Glue
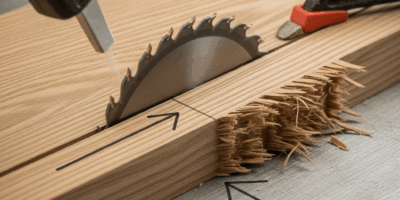
Probably should have started here, honestly. Surface prep is where 80% of joint failures originate. Rough surfaces look like they should glue fine. They don’t.
Machine-planed lumber comes with a polished mill glaze sitting on top like a seal coat. You can’t see it. Your glue can’t penetrate it. I found this out after a set of mortise-and-tenon joints all came loose within two weeks — every single one. Turned out my planer was running too hot, burnishing the surface rather than cutting it cleanly. Frustrating doesn’t cover it.
Here’s a trick worth knowing. Take both pieces you’re about to glue and hold them up to a bright window at a shallow angle — a shop lamp works too. Light streaming through any gap means the surfaces aren’t truly mated. Even a gap the width of a pencil lead creates a void that becomes a failure plane the moment the glue hardens.
Contamination kills joints quietly. Dust trapped between surfaces, stray finish, old glue residue, even the oils from your hands — all of it prevents mechanical bonding. I’ve watched woodworkers drop $40 on premium Titebond III and sabotage it with 30 cents’ worth of sawdust. Don’t make my mistake.
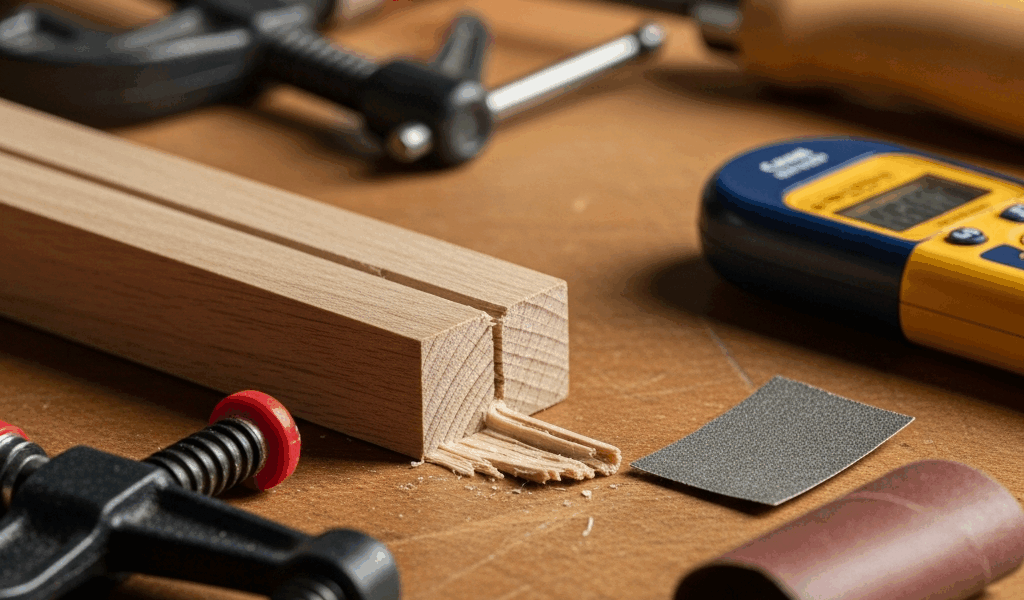
End grain is its own problem. But what is end grain absorption? In essence, it’s a wicking effect that pulls moisture in fast and causes surrounding wood to swell unevenly. But it’s much more than that — it changes how the glue cures entirely. Sand end grain lightly and let it sit in your shop for a full day before gluing. The difference is real.
The fix is simple: surface-plane both mating faces again, lightly, using sharp knives or fresh 120-grit sandpaper. Wipe with a tack cloth. Let everything dry fully before assembly. Ten minutes now prevents six weeks of regret.
Step 2 — Evaluate Your Clamping Setup
Perfect surfaces mean nothing if the clamping is wrong. This is where carelessness shows up and charges interest later.
Pressure has to be even across the entire glue line. Too few clamps and the middle of a wide board starves while the edges hold — the joint looks fine until it doesn’t. I typically space clamps every 6 to 8 inches on a face glue-up and alternate them above and below the panel to avoid cupping. That spacing matters. So does alternating.
The squeeze-out test confirms that pressure is actually reaching the joint. When you tighten the clamps, a thin, even bead of glue should appear along the entire seam. Uneven beading means uneven pressure. No beading at all means you’re under-clamping. A visible line of squeeze-out tells you the glue is being pressed into the fibers — not just filling a gap and hoping.
Clamping time depends entirely on glue type. PVA glues — most woodworker-grade yellow and white glues — need 30 minutes to an hour at room temperature. Polyurethane glue needs longer, sometimes a full 24 hours, because it expands as it sets. Epoxy varies by formulation. I’m apparently a label-reader and keeping the bottle nearby works for me while guessing from memory never does. A $6 bottle of Titebond III tells you exactly: clamp 30 minutes for assembly, 24 hours for full strength. That label exists for a reason.
Pulling clamps too early is basically scheduling a failure. The glue line is still soft. I’ve separated joints just by handling them after an hour, convinced I was done. Wait the full time.
Step 3 — Rule Out Wood Movement and Humidity
Sometimes the joint fails weeks after glue-up. That’s not a glue problem. That’s not a clamping problem either. That’s wood movement — and it operates on its own timeline.
Wood that wasn’t acclimated to your shop will shift after the glue cures. A board from a dry warehouse, moved into a shop running at 50% humidity, will swell. That swelling creates stress at the joint. A well-prepped joint handles some movement. An under-clamped or poorly prepped joint cannot.
I once had a set of drawer fronts stay perfectly tight for three weeks, then start separating right along the edge banding seams. The shop had gotten damp — I’d left the door open through a rainy stretch, maybe four or five days. The expansion was just enough to stress the already-marginal adhesion. That was a $180 lesson.
Check moisture content before gluing. A cheap $20 meter from Harbor Freight will tell you if two pieces match. If they’re more than 2 to 3 percentage points apart, one will move — and the joint pays for it. Let the wetter piece acclimate until the readings converge.
A joint that failed during cure points to prep or clamping. A joint that failed weeks later points to humidity. That distinction saves real time in diagnosis. That’s what makes moisture awareness so endearing to us woodworkers — it explains the failures that seem to come from nowhere.
How to Reglue a Failed Joint the Right Way
So, without further ado, let’s dive into the actual repair — which only works if you’ve already identified the root cause. Regluing over an unresolved problem just schedules failure for round two.
Break the joint apart cleanly. Tap a chisel in gently rather than yanking and splintering the face. Remove all old glue residue with a sharp paint scraper — a $4 one from any hardware store works fine — then sand the surfaces smooth with 120-grit paper. Dust everything thoroughly.
First, you should fix the original failure mode — at least if you want the repair to actually hold. Surface contamination or mill glaze? Replane or sand the mating faces again. Clamping failure? Buy two more clamps before reassembling. Humidity issue? Acclimate both pieces to a stable environment first. Skipping this step is just optimism dressed up as woodworking.
For the reglue itself: standard PVA works fine if surfaces are clean and clamping is correct. Polyurethane might be the best option, as regluing old joints requires gap-filling ability. That is because the mating surfaces rarely come apart perfectly clean — there’s always some minor irregularity left behind. Polyurethane expands as it cures, which actually helps seat the joint tighter. Use about 50% less clamp pressure than you’d use with PVA — it needs room to expand. Epoxy offers similar forgiveness if you’re working with problem species or unusual joint geometry.
Clamp as before. Wait the full time. Then — seriously — figure out what caused the original failure so the whole process doesn’t repeat itself three months from now.


Stay in the loop
Get the latest classic custom wood furniture updates delivered to your inbox.