
Why Wood Glue Fails in the First Place
Wood glue troubleshooting has gotten complicated with all the conflicting advice flying around. I’ve stared at joints that looked perfect come apart under the slightest pressure — more times than I’d like to admit. But here’s the thing I kept getting wrong: the glue itself almost never fails. The bond does.
Three things kill a glue joint before the glue even gets a chance:
- The surfaces aren’t clean or properly prepared
- The glue was applied after its open time window closed
- Clamping pressure was wrong — either starving the joint or crushing it
There’s a fourth culprit too: using the wrong glue type entirely. That gets its own section because the fix is completely different.
The real trick is figuring out which one actually happened. Most woodworkers guess. That’s how you end up dropping $60 on new clamps or switching brands when the problem was dust sitting on the surface the whole time.
Surface Problems That Kill the Bond
Clean surfaces aren’t optional. They’re foundational. Full stop.
Oils are the silent killer. Teak, rosewood, and certain pine boards naturally shed resinous oils that create an invisible barrier between wood and glue. I once glued up a set of teak drawer fronts — eight of them, for a kitchen remodel — and walked away feeling confident. Two weeks later, they delaminated. Cost me an entire Saturday of rework and about $40 in wasted material.
Now I treat oily woods differently. Wipe the glue surfaces with naphtha or acetone on a clean cloth about 15 minutes before assembly. Let it evaporate completely. This dissolves the oils without raising grain the way water would. For stubborn pitch pockets on pine, a second pass with straight acetone usually handles it.
Dust is another one. Here’s something that genuinely surprised me when I first learned it: sanding too fine actually makes things worse. Sand with 180-grit or higher and you’re closing the wood’s surface pores while leaving behind a layer of particles that won’t brush away cleanly. That dust sits between joint surfaces and starves the glue of real contact.
Stop sanding at 120-grit on any surface getting glued. Wipe immediately with a slightly damp cloth or tack cloth. The moisture opens the pores again and pulls particles off. Wait 30 minutes — not hours — before gluing. Wood breathes, moisture evaporates, and the surface re-closes if you wait too long.
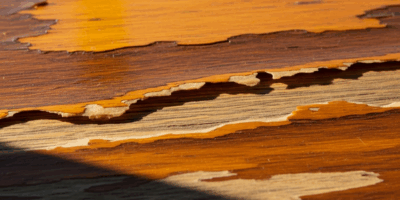
Old finish residue is sneaky. You sand off a joint, but bits of varnish or paint stay buried in the pores. Glue can’t reach the wood fiber underneath. Break the old joint completely, scrape out residue with a card scraper, and don’t assume sanding alone got it. Probably should have opened with this section, honestly. I glued directly over finish residue three separate times before it finally clicked what I was doing wrong.
Moisture matters too. Fresh-milled wood works fine. Bone-dry wood works fine. Wood that’s been sitting in a humid garage for three months is another story entirely. Glue needs moisture to cure — but not too much. If wood is too dry, glue skims over without soaking in. If it’s too wet, the glue dilutes. Store lumber at 45-55% relative humidity when you can, or at minimum, don’t glue boards that feel cold and damp to the touch.
Clamping Mistakes That Cause Weak Joints
Open time is the window between applying glue and when it begins to gel. Miss it and the glue can’t flow into the wood pores. Simple as that.
PVA wood glues — Titebond Original, Elmer’s Carpenter’s Wood Glue — set faster than most people expect, especially in warm shops. At 70°F, open time runs roughly 15 minutes. At 85°F, you’re looking at eight. If you’re prepping your joint while glue sits on the surface, it’s already skinning over by the time you clamp. Press your fingertip into the glue film. Tacky but not wet means you’ve already waited too long.
Apply glue, assemble immediately, clamp. Dry clamp first if you want to check fit — smart move — but then unclamp, glue, and reclamp within that window. Don’t make my mistake of gluing during the dry clamp run and wondering why nothing held.
Clamp pressure breaks joints in two opposite directions. Too light and you starve the joint — glue can’t flow between surfaces, air gaps form. Too much pressure squeezes all the glue out, which sounds impossible until you watch it happen. I once over-clamped edge-glued panels using a 48-inch bar clamp cranked to full tension. The joint held fine. Right up until it didn’t. Under load, it snapped clean.
For PVA on flat joints, aim for 100-150 psi. That’s enough to see a thin bead squeeze out from all sides without the wood visibly compressing. A $35-40 digital postal scale under a clamp foot tells you exactly what you’re applying. Most woodworkers guess. Most woodworkers are wrong.
Uneven clamping is invisible until it isn’t. Clamp one end of a board and the other end lifts slightly, creating a gap across the joint. Pressure always flows along the path of least resistance. Use multiple clamps across the length. Alternate direction — one from above, one from below — to keep things flat and true.
When You’re Using the Wrong Glue for the Job
But what is a glue failure, really? In essence, it’s a mismatch between glue chemistry and application conditions. But it’s much more than that — it’s usually one of three very specific mismatches.
PVA glues fail on outdoor work. Titebond Original is not waterproof. Not even close. Water enters the joint, the glue softens, the joint fails. This isn’t a secret — it’s just information most woodworkers skip past. If the finished piece sees weather, rain, or regular moisture, use waterproof PVA like Titebond III, or step up to epoxy. The cost difference between Original and Titebond III is about $3 per bottle. That’s worth knowing.
CA glue on large surface areas creates brittle joints. Superglue works by soaking into wood and setting instantly. On a small dowel joint or a loose tenon, it’s genuinely great. On a 10-inch edge-to-edge panel joint, the glue line becomes a thin rigid plastic layer that doesn’t flex with wood movement. It shatters under stress. I’m apparently a slow learner and CA glue worked fine for me on small repairs while it never held on anything structural. CA glue belongs on small parts, not primary joints.
Polyurethane glue — Gorilla Glue being the obvious one — foams when over-applied. The expansion is useful for gap-filling. Too much creates a foam-packed joint that’s actually weaker than solid glue. Polyurethane also pulls moisture from the wood during cure, which means you must dampen the surfaces first. Over-apply on a dry board and you get expansion without proper curing. That’s a joint that looks fine and isn’t.
If your joint failed and one of these combinations was involved, the fix is simply switching glue types next time. That’s the whole diagnosis.
How to Reglue a Joint That Has Already Failed
Breaking the joint completely is step one. A joint that failed once will fail again if you glue over the failure. Use a chisel along the seam. Hammer along the edge until it splits. Get it fully apart — no half-measures.
Remove all old glue. Dried PVA is essentially slick plastic, and new glue will not bond to it. Scrape with a card scraper or a dull chisel. Light sanding helps, but don’t oversand — you’ll gouge the mating surfaces. Bare wood on both faces is the goal, not a polished finish.
Re-prep the surface. Tack cloth if the wood is dusty. Naphtha wipe if it’s oily. If the piece has been sitting for several weeks, a light sand and another wipe matters more than you’d think. Wood ages, surfaces oxidize, and a quick refresh makes a real difference to adhesion.
Dry clamp before gluing. Every single time. This catches fit problems without wasting glue or open time. Adjust shims or lightly sand edges if needed. Once the dry assembly is tight with no gaps, unclamp and apply fresh glue.
Clamp within the open time window. Keep pressure consistent across the joint. Wait a full 24 hours before removing clamps — longer than most directions specify, but it guarantees full cure. That’s what matters.
The joint will hold this time. Most failures aren’t about bad luck or bad glue. They’re about skipping one step — usually one of the steps above.

Stay in the loop
Get the latest classic custom wood furniture updates delivered to your inbox.