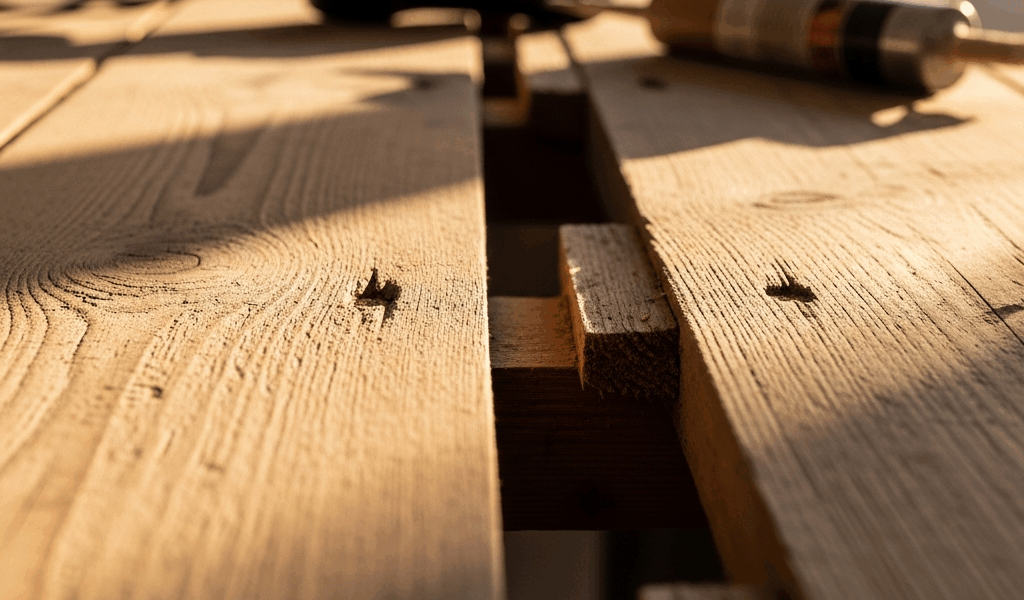
Why Wood Gaps Appear in Certain Seasons
Fifteen years into dealing with wood movement in my own home, I still remember that February afternoon when a half-inch gap mysteriously opened up in my hardwood floor. My first thought? I’d absolutely botched the installation. Turns out, I hadn’t. Wood moves. It’s not some catastrophic failure—it’s just physics doing what physics does.
Here’s what actually happens: solid wood expands and contracts with seasonal humidity changes. Moisture goes in, wood swells. Moisture leaves, wood shrinks. The wild part? This happens dramatically across the grain (the width of a board), but barely at all along the grain (the length). Take a 1×10 pine board in a climate with extreme seasonal swings — it might shift nearly half an inch in width over a year. The length? Barely budges.
Winter hits hardest, honestly. Heated indoor air becomes drier. In northern climates, humidity can plummet from 50% in October down to 25% by January. Your solid wood flooring, furniture, trim — it all shrinks. Then spring arrives, humidity climbs back up, and those gaps often partially or completely close. This dance repeats every single year.
But not all wood behaves the same way. Red oak and ash? Notorious movement-prone species — their dramatic grain structure absorbs and releases moisture unevenly. Walnut and cherry move less noticeably. Teak, being naturally oily, barely moves at all. If you’ve got quartersawn (rift-sawn) flooring installed, you’ll see far less movement than plain-sawn because the grain orientation changes how moisture travels through the wood.
Here’s the game-changer: plywood and engineered hardwood move far less than solid wood. Those cross-grain veneer layers restrain each other. That’s why engineered products actually work better in basements or kitchens where humidity swings wildly.
How to Tell if Gaps Are Normal or a Problem
Not every gap deserves panic or repair. Probably should have opened with this section, honestly, because unnecessary “fixes” cause more damage than leaving things alone.
What counts as acceptable depends entirely on what you’ve installed. Hardwood flooring — gaps under 1/8 inch (3mm) are completely normal and expected by any inspector or contractor worth their salt. Between 1/8 and 1/4 inch? That happens regularly during dry winters and usually closes by summer. Anything wider than 1/4 inch warrants investigation, but honestly, it’s often just timing.
Furniture and cabinet work are different animals. Solid wood tabletops and cabinet sides might show gaps of 1/16 to 1/8 inch seasonally. Quality furniture makers deliberately space panels and use floating (unglued) construction — they anticipate this movement. A gap around a raised panel isn’t a flaw. It’s the design working.
Trim and baseboard gaps are so common that most painters just expect them. A 1/16 inch gap disappears once caulked and painted. Anything wider suggests either installation error or something structural underneath that needs attention.
The red flags — gaps appearing on only one side of a room (moisture source or settling?), gaps that grow consistently year after year instead of cycling seasonally, or gaps accompanied by cupping, bowing, or splitting in the wood itself. If your floor buckles along with the gaps, you’ve got moisture intrusion, not normal movement. If boards split lengthwise as gaps widen, that’s stress from uneven drying or improper acclimation before installation.
Also watch for uneven gaps — if every third board has a gap but others don’t, that board might have been installed under stress, or it’s a different species with different movement characteristics than its neighbors.
Quick Fixes for Visible Gaps You Want to Close Now
Some gaps just look bad. You want them gone, regardless of whether they’re “normal.” Here’s what actually works and what wastes your time.
Wood filler for small gaps (1/16 to 1/8 inch): Sand the gap area lightly to remove dust. Match your wood color when dry — this matters more than you’d think. Minwax Wood Filler and Elmer’s Carpenter’s Wood Filler are reliable options, though they shrink slightly as they cure. Push filler into the gap using a putty knife at a 45-degree angle, overfilling slightly. Let it dry per manufacturer specs (usually 2–4 hours), then sand flush with 120-grit sandpaper. Stain and finish after sanding. Works well for trim and furniture but feels temporary in flooring because foot traffic can dislodge it.
Rope caulk for larger gaps (1/8 to 1/4 inch) in trim and baseboards: This is cosmetic only — meant for seasonal gaps that close again. Rope caulk (sometimes called backerboard) doesn’t cure hard like silicone. It stays flexible. Press it into the gap, smooth it, paint over it. Come summer when the gap closes, the rope caulk compresses without cracking the paint. Honest choice if you know the gap will partially close.
Shim and glue for gaps where boards pulled apart entirely: This works for flooring or cabinetry where solid wood pieces have separated and won’t re-close on their own. Dry fit a wood shim (thin tapered wedge) into the gap. If it fits tight without forcing, apply waterproof wood glue to one face, tap it in gently with a rubber mallet, clamp if possible. Let it cure 24 hours. Chisel and sand flush. Semi-permanent, relies on the shim staying put — which it usually does as long as you’re not forcing it.
The glue-and-wedge method for larger gaps in solid wood: Cut cedar or pine wedges slightly wider than your gap and as long as the gap is wide. Apply glue to two sides of the wedge, tap it in with a mallet until snug (not forced). Let dry 24 hours. Saw the wedge flush and sand smooth. Works best on furniture or decorative pieces where the wedge direction is visible. Flooring? No.
Real talk: all these fixes are semi-permanent. If the gap reopens next winter, you’re doing this again. Most contractors would rather caulk a gap that cycles seasonally than waste time with permanent fixes that never quite match once sanded.
Long-Term Prevention for Future Projects
Preventing gaps before they appear saves the hassle entirely.
Acclimate your wood. Delivered solid hardwood flooring or lumber should sit in the space where it’ll be installed for at least 7 days — 2 weeks is better. Lets the wood adjust to local humidity and temperature before it’s locked in place. I’ve seen installers skip this step and watch floors gap within weeks. The wood is simply adjusting to its actual environment, not the warehouse it shipped from.
Target indoor humidity of 30–50% year-round reduces movement significantly. Harder in cold climates without humidifiers, almost impossible in humid ones without dehumidifiers, but it’s the ideal. Even moving your winter humidity from 25% to 35% cuts expected movement roughly in half.
Wood selection matters. In climates with wild swings, choose species with moderate movement: cherry, maple, or walnut instead of oak. Use quartersawn lumber when possible — it moves 50% less across the grain than plain-sawn. Yes, it costs more. Yes, it’s worth it if seasonal gaps bother you.
Grain direction: wider boards move more than narrow boards because they have more wood to swell and shrink. Randoms-width flooring (mixing 3-inch, 5-inch, and 7-inch widths) hides gaps better because they’re less uniform. Stripe or random patterns also make small gaps less obvious than uniform runs of 2-1/4 inch boards.
Finishing technique: finishes that form a harder barrier — polyurethane, lacquer, hard wax oil — slow moisture exchange compared to water-based finishes. A thick polyurethane coat on unfinished wood can reduce wood movement by 10–20%. Matters most on furniture and trim, less on flooring where the finish is mostly for appearance anyway.
When to Leave Gaps Alone
This section is the permission slip most people need. Not every gap requires fixing.
Gaps that open and close seasonally are normal. Your wood is breathing. Forcing those gaps closed permanently — by driving wedges, applying permanent fillers, or clamping boards together — creates stress. That stress goes somewhere: warping, splitting, finish cracks. I’ve watched woodworkers build beautiful furniture only to see it crack the following winter because they forced miters or joints too tight, leaving no room for seasonal movement.
Cosmetic gaps in furniture and trim don’t hurt structural integrity. A small gap under a tabletop or along baseboards is invisible once painted and doesn’t affect function. Spending time on a fix that might look worse than the gap itself is often the wrong call.
Raised panels in cabinetry are designed to gap. Those panels float inside their frames on purpose. A gap between panel and frame is the intended design. Filling that gap defeats the purpose and prevents the panel from moving freely.
Flooring gaps under 1/8 inch seasonally are normal and don’t indicate failure. Your floor isn’t damaged. The manufacturer knows this happens. Leave it. By spring, many of those gaps partially close anyway.
The real problem to solve isn’t the gap — it’s whether moisture is actually entering from below (bad) or whether you’re simply experiencing normal seasonal wood movement (fine). Check under the flooring if you suspect moisture. Check for mold or water damage. If the wood is dry and there’s no structural movement, the gap is just cosmetic. Time will likely handle it for you.



Stay in the loop
Get the latest classic custom wood furniture updates delivered to your inbox.