Why Orbital Sanders Leave Swirl Marks at All
Orbital sanding has gotten complicated with all the conflicting advice flying around. Everyone’s got a theory. Sand faster, sand slower, buy better discs, blame the tool. I’ve heard it all — and honestly, most of it misses the actual problem entirely.
But what is a swirl mark, really? In essence, it’s a physical scratch gouged into the wood surface in tiny circular arcs by the abrasive grit. But it’s much more than that. It’s a symptom. Something specific went wrong — in your technique, your equipment, or your grit sequence — and the wood is showing you exactly where.
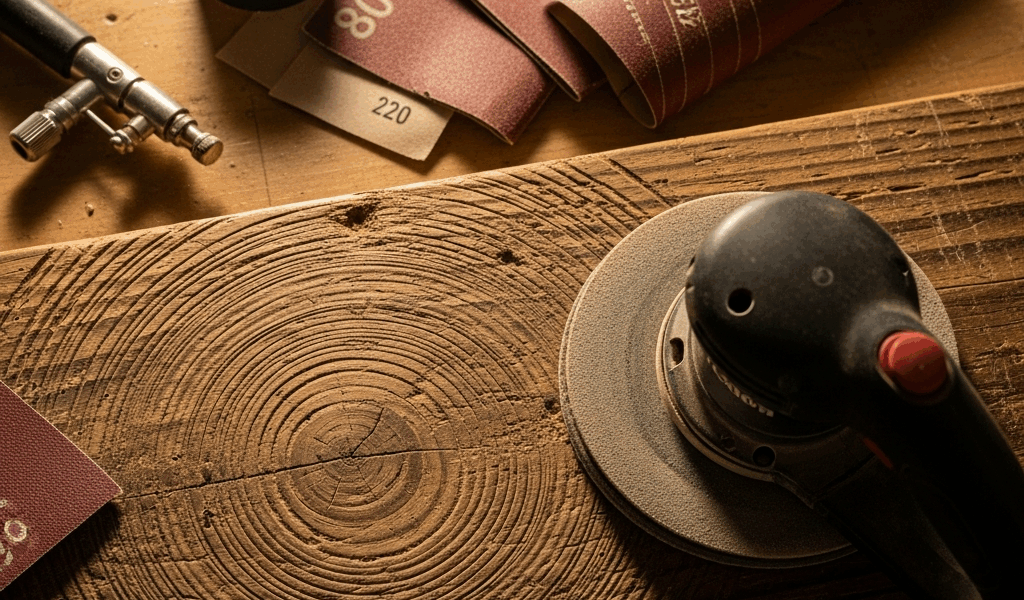
A random-orbit sander spins while vibrating side-to-side simultaneously. That dual motion is the whole point. It’s what makes these tools cut fast without leaving straight-line scratches. Until something disrupts that randomized pattern, anyway. Then the sander stops smoothing and starts marking.
Most people write the tool off as flawed. That’s the wrong conclusion. Swirl marks always trace back to something specific. Find that thing, fix it, save yourself three hours of frustrated re-sanding on a Saturday afternoon.
You Skipped a Grit in Your Sanding Sequence
This is the culprit roughly 70% of the time. I learned this standing in my garage at 10 p.m. with a walnut tabletop that looked like something had dragged a wire brush across it in slow circles. Not great.
Here’s the mechanical reality: jumping from 80-grit straight to 220-grit leaves deep scratches that the finer abrasive literally cannot reach. A 220-grit disc cuts shallower — that’s its job. It refines, it polishes, it doesn’t remove. Those heavy 80-grit gouges just become shinier gouges. Still there. Invisible under shop lighting, absolutely brutal once stain hits the wood.
The correct sequence looks like this:
- 80-grit (stock removal, if needed)
- 120-grit (cutting the 80-grit scratches)
- 180-grit (cutting the 120-grit scratches)
- 220-grit (final finish-prep)
Each grit handles the previous one’s damage. That’s the logic. A 120-grit disc can erase an 80-grit scratch pattern because it’s only one step finer. Jump two steps and you’re just polishing the problem. You won’t see it until it’s too late — at least if you’re working under incandescent shop lights, which lie constantly.
Probably should have opened with this section, honestly. It solves most cases immediately.
I’ve had surfaces look perfectly clean under warm overhead lighting, then walked them outside into afternoon sun and found swirl marks everywhere. Don’t trust your eyes until you’ve raked a strong flashlight across the grain at a low angle. That’s what I do now, every single time, before I touch a finish.
Pad Pressure and Speed Are Working Against You
Pressing down on a running orbital sander feels right. It’s instinctive — more pressure means more cutting, right? Wrong. The pad slows under the load, the random-orbit action breaks down, and the disc starts dragging in heavier circular patterns instead of the randomized ones it’s designed to produce. That’s where the marks come from.
The fix feels backwards: lighter pressure, slower hand movement.
I’m apparently a natural over-presser and my Festool RO 150 works fine for me while my older Ridgid variable-speed never cut cleanly. Took me an embarrassingly long time to figure out I was just mashing the thing into the wood. Don’t make my mistake.
Too much downward force generates heat, too. Dust clogs the grit instead of clearing, and you end up burnishing — the disc spins but doesn’t actually cut. You’re just buffing a progressively shinier scratch pattern into the surface.
Speed matters separately. Moving the sander across the wood too fast doesn’t give the abrasive enough contact time to bite cleanly. Think of it this way — the grit needs roughly half a second of dwell time per pass to do its job. Rush it in one fluid sweep and you’re laying down partial scratches at constantly shifting angles. The next pass catches them differently. Crosshatch. Swirls. Frustration.
Let the sander’s weight do the work. Move slowly, overlap each pass by about 50%. Variable speed? Stay between 10,000 and 12,000 RPM for fine grits. Drop lower for aggressive stock removal with coarser discs.
Your Sanding Pad or Disc Has a Problem
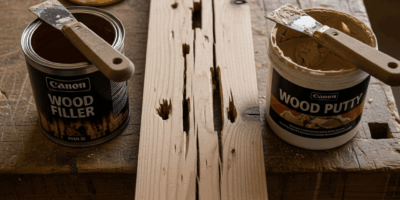
A loaded disc is a dead disc. Once the abrasive fills with dust and resin — especially on pine or other soft woods — it stops cutting entirely. You’re just dragging clogged, worn grit across the surface. Burnishing, not sanding. Swirl marks follow almost immediately.
Hold your disc up to direct light before every job. If the grit surface looks gray and caked instead of sharp and defined, replace it. Yes, this costs money. A 25-pack of Festool Granat discs — probably the gold standard for finish work — runs somewhere around $35 to $45 depending on the grit. Using one disc until it’s genuinely destroyed is false economy. You’ll spend that $8 in wasted time easily.
Hook-and-loop attachment failure is common and almost always missed. A warped backing pad, or one that’s slightly off-center on the sander’s plate, wobbles during operation. The disc makes uneven contact. You get circular drag marks in specific spots that make no sense until you press the disc flat with your palm and notice it rocks slightly. That’s your problem right there.
Cheap discs from big-box stores sometimes have inconsistent grit distribution or bonding that fails mid-job — particles shed, scratch patterns become erratic. That’s what makes quality brands endearing to us finish woodworkers. Festool, 3M, Mirka. Pick one, stick with it, replace discs before they’re visibly spent.
How to Remove Swirl Marks Already in the Wood
So the marks are already there. Recovery is straightforward — at least if you don’t rush it.
Drop back one full grit. Swirls appeared after 220-grit work? Go back to 180 and sand the entire surface again. Light pressure, slow movement, full coverage. Then — and this is the step most people skip — put the orbital sander down and hand-sand with a block, moving only with the grain. That grain-direction pass cuts the circular scratches without introducing new ones. Nothing else does this as cleanly.
Once the swirls are gone — verify this with a flashlight held at a low angle across the surface, not overhead — work back up through the sequence. 180, then 220, orbital sander again with proper technique. Finish with a hand-sanding pass in the grain direction using 220-grit paper or 0000 steel wool. That last pass removes any remaining crossgrain scratches and ensures stain pulls evenly.
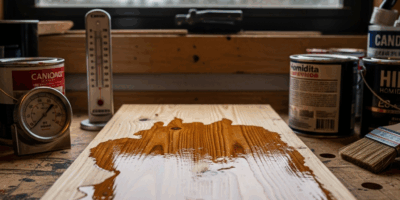
Do not skip the final hand-sanding step. I did once, on a cherry side table, applied the first coat of Waterlox, and watched every swirl mark reappear like it had been waiting for me. That new idea of “close enough” took several hours of stripping and re-sanding to fix, and eventually evolved into a strict rule I follow on every project now.
Check everything under raking light before you call it done. Seriously. Sunlight from a low angle at the end of the afternoon will find things your shop fluorescents never will — and it’s a lot better to find them before the finish goes on.


Stay in the loop
Get the latest classic custom wood furniture updates delivered to your inbox.