Why Wood Glue Fails in the First Place
Wood glue troubleshooting has gotten complicated with all the conflicting advice flying around. As someone who’s spent fifteen years making joints in a dusty shop, I learned everything there is to know about why glue fails. Today, I will share it all with you.
This article includes affiliate links. We may earn a commission at no extra cost to you.
Here’s the thing nobody tells beginners: the glue is almost never the problem. The adhesive bonds to wood fiber — period. Not to oil. Not to dust. Not to old finish or sealed pores. When a joint fails, something sitting on that surface blocked a molecular bond from forming. Most woodworkers sand, clamp, and stare at separated joints months later wondering what went wrong. The culprit was invisible the whole time.
But what is wood glue failure, exactly? In essence, it’s a surface preparation problem. But it’s much more than that — sometimes it’s timing, sometimes it’s pressure, sometimes it’s the species itself. Understanding which one you’re dealing with is the difference between a joint that lasts decades and one that pops loose under your first coat of finish.
The Most Common Causes and How to Fix Each One
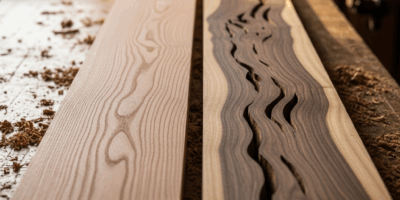
Oily and Resinous Woods Reject Standard Glue
Teak, rosewood, ipe, and cocobolo. These species contain natural oils that sit like an invisible film across every surface. Standard PVA cannot penetrate that barrier — it just sits on top and pretends to bond. I learned this the hard way after a teak cutting board joint failed under barely any stress. Embarrassing, honestly.
The fix is non-negotiable: wipe the glue surfaces with acetone on a clean rag five to ten minutes before assembly. Acetone dissolves those surface oils without raising the grain. Let it evaporate completely. Don’t skip this step because you’re in a hurry. That ten-minute wait saves three hours of rework. Don’t make my mistake.
Glue Skin Has Already Formed
Open time is real and most woodworkers ignore it completely. PVA-based wood glue — Titebond II, Elmer’s Carpenter’s — begins to set within 15 minutes in a 70°F shop. Bump that to 75°F and you’re down to 10 minutes. If your shop runs warm or your assembly is slow, the glue on both mating surfaces starts polymerizing before you ever tighten a clamp.
The result looks glued. It feels tacky. The bond never actually forms because the glue molecules are locked in an intermediate state instead of migrating into the wood fiber. That’s what makes open time so sneaky — the failure is invisible until the joint pops six months later.
Check the open time printed on your bottle and work backward. Complex joint taking 12 minutes to assemble? You need 18 minutes of open time minimum. No margin there? Switch to polyurethane glue — Gorilla Glue stays workable for 20-plus minutes even in a warm shop. Or cool the wood first. Five minutes in a cooler before gluing genuinely works. I’m apparently sensitive to heat in my shop and the cooler trick works for me while rushing the assembly never does.
Clamp Pressure Is Insufficient or Uneven
Probably should have opened with this section, honestly. Woodworkers dramatically underestimate the pressure required. You need enough force to bring fibers into actual molecular contact — roughly 100 to 150 pounds per square inch for butt joints and edge glues. A single bar clamp tightened by hand doesn’t deliver that. Not even close.
Uneven pressure is worse than low pressure. One side clamped tight, the other side loose — only half the glue line makes contact with the wood. That joint fails at the loose section every single time. Use at least two clamps per glue line, positioned opposite each other, cranked until loosening them hurts your hand slightly.
Do a dry run first. Tighten the clamps, check for even pressure along the entire joint, look for gaps. If gaps exist when dry, glue won’t fill them — at least not securely. Fix the fit before applying a drop of adhesive. Your assembly method has a problem if gaps keep appearing. Fix that, not the glue.
Surfaces Sanded Beyond 220 Grit Close the Pores
This surprised me the first time I read it. Sanding past 220 grit actually closes the wood’s pores and prevents glue from penetrating. You want surface texture, not a glass finish. Sand to 150 to 180 grit for maximum glue grip. The surface should feel slightly rough to your palm — not smooth, not polished. If it feels polished, you’ve gone too far. Strip it back with 120 grit and stop at 150. I’ve watched this single mistake ruin dozens of joints from otherwise careful builders.
Finish, Wax, or Sawdust Residue Blocks the Bond
Any contaminant blocks the glue from reaching bare wood fiber. Old finish, furniture wax from a previous project, sawdust trapped in open grain — all of it. Wipe surfaces with a tack cloth after sanding and glue within two hours. Sawdust settles fast. Use compressed air or a soft brush immediately after sanding, then hit it with the tack cloth. A surface that looks clean isn’t the same as being clean. That difference is what separates joints that last from joints that don’t.
When the Wood Itself Is the Problem
Some species are simply difficult. Frustrated by failed joints on beautiful but oily exotics, a lot of woodworkers just switch to epoxy and never look back. This new approach took off several years back and eventually evolved into the standard workflow enthusiasts know and rely on today.
For naturally oily exotics, use two-part epoxy or a specialized adhesive designed specifically for difficult species. Epoxy physically fills gaps and cures via chemical reaction — it doesn’t rely on penetration at all. Slower to cure and messier than PVA, yes. But it works. Most two-part epoxies, West System or TotalBoat being the go-to options, run $20 to $40 per kit and stay workable for 30 to 45 minutes. That also solves the open-time problem in warm shops.
While you won’t need a fully stocked chemistry lab, you will need a handful of reliable adhesive options in your shop. Acetone-based exotic wood glues are another solid choice — products engineered specifically to pre-solve the oily-surface problem. They cost more than standard PVA, but if you regularly work teak or rosewood, the price difference is irrelevant compared to the time you lose reworking failed joints.
How to Test a Glue Joint Before It Lets You Down
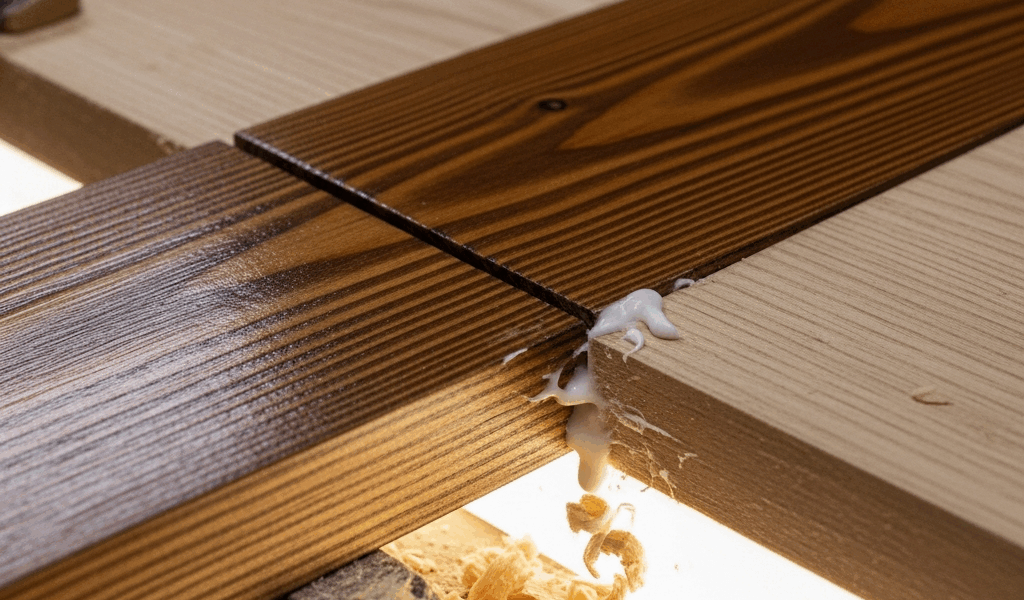
Run a dry clamp first. Assemble the joint without glue, tighten to intended pressure, and look for gaps. If gaps exist dry, glue won’t fill them securely. Pull a straightedge along the joint line — any light showing through means rework. Fix the fit. Then glue.
After gluing and clamping, watch the squeeze-out. A thin bead around the entire joint perimeter is correct. Excess squeeze-out means too much glue or too much clamp pressure — neither helps, and one wastes product. No squeeze-out at all means inadequate pressure. Loosen and re-tighten immediately.
Once cured, test a scrap joint by hand-applying stress. A properly bonded joint will splinter the wood before the glue line ever separates. That’s what you’re aiming for. That’s what success looks like.
Choosing the Right Glue for the Job
PVA — Titebond II, standard carpenter’s glue — is fine for interior softwoods and non-oily hardwoods. Fast, cheap, easy water cleanup. Pine, poplar, maple, ash in dry indoor furniture. That’s its lane.
Polyurethane glue, Gorilla Glue being the obvious name here, handles oily woods, outdoor pieces, and high-moisture environments. Longer open time, waterproof when cured, genuine gap-filling capability. Costs two to three times more than PVA. Worth it for teak, ipe, exterior joinery, or any tight assembly timeline in a warm shop.
Two-part epoxy works on anything — oily exotics, gaps, mixed materials, wet situations. Overnight cure for full strength, no water cleanup, expensive. Use it for repair work, oily tropical hardwoods, or furniture that will see real moisture exposure.
Quick recommendation pattern: Gluing interior maple furniture? PVA. Exterior ipe deck or teak table? Polyurethane. Working with rosewood or cocobolo indoors? Epoxy. So, without further ado — get the surface right first. The glue choice matters a lot less than what’s sitting on that wood when you apply it.

Stay in the loop
Get the latest classic custom wood furniture updates delivered to your inbox.