
As someone who installed a French cleat system on one wall of my shop about three years ago, I learned everything there is to know about wall-mounted tool organization. Today, I will share it all with you. It’s the single best organization decision I’ve made — everything hangs within reach and I can rearrange the whole layout whenever my workflow changes.
The Basic Concept
Two boards with matching 45-degree bevels. One mounts to the wall with the bevel facing up. The other mounts to whatever you want to hang, bevel facing down. They hook together and gravity locks them in place. Simple, strong, and infinitely flexible.
Need to move something? Lift it off, put it somewhere else, done. No holes to patch, no screws to move. French cleat storage has gotten complicated with all the fancy prefab systems flying around, but the basic concept is still two pieces of plywood ripped at 45 degrees.
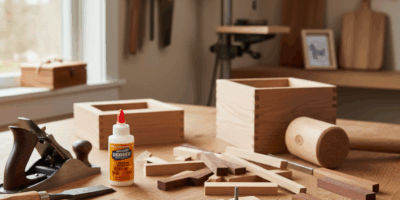
Making the Cleats
Rip 3/4″ plywood at 45 degrees down the middle. Each pass gives you two cleats — one wall piece and one hanger piece. I made a big batch all at once so they’d be consistent. Cut them into lengths that work for your wall — mine are in 4-foot sections so I can reach the mounting screws easily.
Installing Wall Cleats
Find your studs. These cleats will hold heavy tools, so screwing into studs is absolutely essential. I used a level and snapped chalk lines to keep rows perfectly straight.
Space your rows about 12 inches apart vertically. This gives you flexibility for hanging items of different sizes without leaving awkward gaps. Probably should have led with this section, honestly — the wall layout determines how useful the whole system ends up being.
Making Tool Holders
Attach the matching cleat to a piece of plywood, then build whatever holder you need onto that plywood. Shelves, hooks, bins, tool racks — anything you can build can hang on the cleat system.
I’ve made holders for chisels, clamps, power tools, spray cans, and sandpaper. Each one took maybe 15 minutes or less. That’s what makes French cleat systems endearing to us woodworkers — every holder is a fun little mini-project.
Why It Beats the Alternatives
Traditional pegboard limits you to specific hook sizes and hole placements. French cleats let you customize everything from scratch. Tool gets upgraded to a bigger model? Make a new holder. Workflow changes because you rearranged your machines? Move things around in five minutes.
The weight capacity is excellent too. I hang my cordless tool charger station, belt sander, and a full set of bar clamps without any worry. The system handles serious weight as long as you’re into studs.
Beyond the Workshop
People use French cleats in garages for sports equipment, in kitchens for pot racks, in offices for modular shelving. Once you understand the system, you’ll start seeing applications everywhere. My neighbor saw mine and immediately built one in his garage for gardening tools. The concept is that good.

Stay in the loop
Get the latest classic custom wood furniture updates delivered to your inbox.