How to Build a Live Edge Epoxy River Table — Step by Step
River tables have gotten complicated with all the conflicting advice flying around. Bad YouTube tutorials. Forum posts from people who’ve built exactly one table. Guides written by people who’ve clearly never touched a moisture meter. I’ve built seven of these things over the past three years, and the first one was a genuine disaster — warped, cracked, embarrassing. The second one wasn’t much better. By table four, though, I’d finally figured out what actually matters versus what everyone just repeats because they heard it somewhere.
Most guides online are video-only. Fine if you enjoy rewinding the same 45 seconds seventeen times. This one’s different — actual material lists, real troubleshooting, and someone telling you exactly where things go sideways before they go sideways for you.
We’re going from raw slab to finished surface. Every step. Including the embarrassing parts.
Choosing and Preparing the Slab
The slab is everything. Get this wrong and nothing else matters — you’re building on sand regardless of how perfect your pour is.
Species selection isn’t complicated, but it does matter. Walnut is my first choice, honestly. Stable, machines beautifully, and that dark chocolate color makes epoxy rivers genuinely pop. Maple works — harder to flatten, more effort, but stunning results. Cherry is forgiving and easy to source locally in most regions. I’ve used ash and hickory with good results too. Softwoods, though? Avoid them entirely. Pine moves too much. It’ll fight you the whole way.
Moisture Content is Non-Negotiable
Here’s what nobody tells you until you’ve already dropped $400 on a slab: moisture content matters more than everything else combined. More than your epoxy brand. More than your technique. More than anything.
Wood moves. Swells when humid, shrinks when dry. If your slab is still acclimating when you pour epoxy over it, that movement happens underneath the epoxy. Cracks appear. Gaps open along the edges. The river itself might pop out. I watched this happen with table number two — the slab looked stable, felt dry, passed my completely inadequate eyeball test. I poured. Three weeks later, a crack ran the entire length of the table following the grain. The slab had kept acclimating after I’d decided it was done.
Don’t make my mistake. Buy a moisture meter. I use the Lignomat Mini-Ligno — around $85, worth every cent. When a slab arrives, I check eight to ten spots across the surface. You want 8–12% moisture content depending on your climate. Then let it sit in your shop. Two weeks minimum. Three is better. Measure it again after a week of sitting. When readings stabilize over several days without changing, you’re ready. Not before.
Jointing the Live Edge
Probably should have opened with this section, honestly — skipping it on table one cost me three hours picking bark fragments out of curing epoxy with a toothpick at midnight.
The “river” is the negative space between your two live edges. Before epoxy touches anything, those edges need preparation. I run mine through a jointer, taking light passes to remove bark and irregular material. No jointer? A hand plane works fine. The goal isn’t geometric perfection — it’s a clean edge with no loose bark, no debris, nothing that’ll float up through your pour and wreck the finish. Loose bark will float. It always floats.
After jointing, sand the edges with 120-grit. This gives the epoxy something to grip. Blow or brush off all dust completely — use a tack cloth if you have one sitting around. Then measure your gap between edges. That’s your river width. Write it down somewhere you won’t lose it. You’ll need it when calculating epoxy volume, and doing that math twice because you lost a Post-it is annoying.
Building the Mold
A bad mold means epoxy seeping under your table for three days while it hardens into a mess you’ll spend a weekend grinding off. The mold deserves real attention.
Melamine is Your Material
Melamine-coated particle board — that’s the standard. It’s cheap, available at any big-box store, and releases from cured epoxy cleanly without heroic effort. A 4×8 sheet runs about $20 and builds molds for several tables.
Cut strips sized to your table dimensions plus 2 inches on each end. For a 48-inch by 24-inch table, cut strips to 50 inches long and 4–6 inches tall — height depends on your epoxy depth. For most river tables, 3 inches of epoxy works. I typically go 4 to 4.5 inches tall to account for surface irregularities on the slab bottom.
Clamp the melamine to your slab using bar clamps every 12 inches. The strips form four sides of your container. Use cauls — flat scrap wood pieces laid across the clamps — to distribute pressure evenly and stop the melamine from bowing outward mid-pour.
Seal Every Seam With Silicone Caulk
This is where precision actually matters. Epoxy finds gaps the way water finds roof leaks — with enthusiasm and at the worst possible moment.
I use 100% silicone caulk, not acrylic. Brand matters less than type. GE Silicone II in clear is what I keep stocked — usually 3 or 4 tubes per table. Run a continuous bead along every internal corner: melamine to slab, melamine to melamine. Smooth each bead with a wet finger. Let it cure fully, typically 24 hours, though 12 is usually enough for this specific application.
You’ll miss a spot. Everybody does. On my third table, I missed a 2-inch section where two melamine strips joined. Four hours into the pour, I noticed a thin epoxy stream running under the mold onto my shop floor. Stopped everything, let it partially set, patched it with fresh caulk. Lost two days. Run your hand along every internal seam before pouring — you’re feeling for any gap, any rough spot, anything suspicious.
Mold Release is Insurance
Once caulk is cured, coat the mold interior with release agent. Melamine releases decently on its own — this isn’t strictly required — but mold release makes removal dramatically easier and protects your epoxy surface from damage during prying.
Pol-Ease 2300 is what I use. Paste wax-based, costs about $15, lasts through many tables. Apply thin, wipe excess with a cloth, done. Cooking spray works in a pinch but gets tacky and leaves residue I don’t love on finished surfaces.
Before you pour anything — check everything one more time. Hand along every seam. Clamps tight. Level confirmed. This is the last moment to catch problems cheaply.
Epoxy Pour — Getting It Right
Pouring epoxy is simultaneously simple and terrifyingly easy to ruin. The variables are few but they’re unforgiving.
Deep Pour vs Standard Epoxy
But what is deep-pour epoxy? In essence, it’s a slower-curing formulation designed specifically for thick applications. But it’s much more than that — it’s the difference between a finished table and a bubbled, cracked mess on your shop floor.
Standard hardware store epoxy generates significant heat during cure — fine for thin coatings, genuinely dangerous in thick pours. It can bubble aggressively or worse. Deep-pour epoxy manages that exothermic reaction by curing slower, which sounds like a drawback until your river comes out crystal clear instead of foamy.
I use TotalBoat Clear Epoxy Resin in their deep-pour formulation, rated for 4-inch pours. Around $55–65 per gallon depending on supplier. Plan on roughly 1.5 gallons per table, though this varies by slab dimensions and river width.
Calculate your volume before ordering. Length × width × depth in inches, divided by 231, gives gallons. A 48×24-inch table with a 4-inch depth and 0.5-inch average river width works out to roughly: (48 × 24 × 4) + (48 × 0.5 × 4) = 4,608 + 96 = 4,704 cubic inches ÷ 231 = about 20 gallons total space. Epoxy fills roughly 70% of that — the wood occupies the rest — so approximately 14 gallons of epoxy. Buy 20% extra. You will use it.
Temperature Sensitivity is Real
Epoxy cares about temperature. Deeply, consistently, inconveniently.
Your shop needs to be between 65–75°F during the pour. Above 75 and it sets faster than you can work with it — I once attempted a pour on a 78°F afternoon and watched the epoxy thicken to honey consistency while I was still halfway through filling the river. Below 65 and cure time stretches to 48 hours or more before the mold comes off safely. In winter I run a space heater to bring my shop to 70°F before starting. Summer pours happen early morning before things heat up.
Humidity doesn’t matter much — epoxy cures by chemical reaction, not evaporation. Temperature, though, affects both cure rate and surface quality in ways that will absolutely show in the finished piece.
Mixing Epoxy — Precision Matters
Most systems use a 1:1 ratio by volume or weight — check your specific product’s instructions before assuming. I mix by weight using a digital kitchen scale. Eliminates guessing, eliminates ratio errors.
Measure resin into one container, hardener into another. Combine them in a larger mixing vessel. Stir slowly and deliberately for a full three minutes — sides, bottom, halfway scrape-down. You’re incorporating components thoroughly, not whipping air in. This isn’t vigorous. It’s methodical.
After mixing, let it rest for 10 minutes. Entrained air rises and escapes. You’ll see bubbles forming on the surface — that’s exactly what you want. Those bubbles would otherwise stay locked in your pour and show up in your finished river. Let them leave now.
Adding Color — Less is More
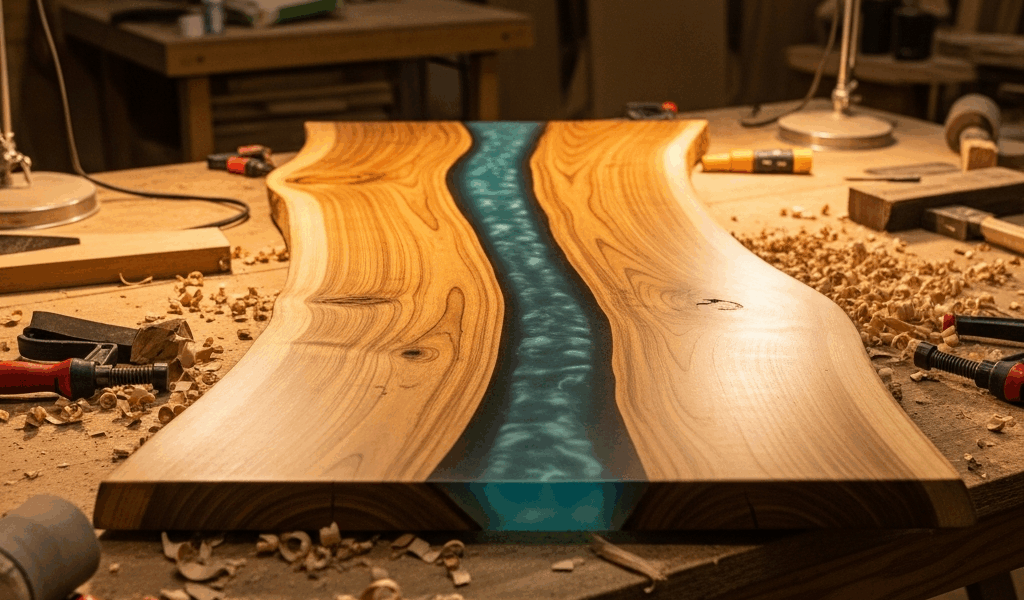
Most river tables use colored epoxy rather than clear. I tend toward deep blues and teals, occasionally metallics — that’s personal preference.
Use epoxy-specific pigments, not paint. Epoxy Paint brand makes excellent concentrates. The amounts involved are genuinely small — I’ve seen people dump a full bottle into a gallon of epoxy and end up with something opaque and muddy. Start with 1/4 teaspoon per gallon. Add more if needed. It’s much easier to add than to subtract.
Add pigment after the 10-minute rest. Stir slowly for another 2–3 minutes until color is completely uniform — no streaks, no variation. Streaks look accidental. Sometimes that’s the goal. Usually it isn’t.
The Pour Itself
Level your table first. An actual level — not eyeballing, not “that looks about right.” Unlevel tables produce epoxy that pools on one side and looks thin on the other, and there’s no fixing that after cure.
Pour slowly from one end, working toward the other. Steady stream, not a dump. The epoxy finds its level; your job is just to guide it there without creating waves or trapping air pockets in corners.
Bubbles will surface as you pour. Ignore them initially. Once the river is filled, take a heat gun and pass it slowly across the surface from about 6 inches up. Heat lowers viscosity slightly — surface bubbles escape instead of staying put. Work methodically across the entire river for 2–3 minutes. Watch the bubbles pop and disappear. It’s oddly satisfying in a way that’s hard to explain until you’ve seen it.
Then walk away. Seriously — just walk away. Don’t prod it. Don’t lean over it breathing warm air onto the surface. Don’t touch it “just to check.” The temptation is real and the results of giving in are always visible in the finished pour. Set a timer if you need to. Come back in 24 hours.


Stay in the loop
Get the latest classic custom wood furniture updates delivered to your inbox.