
You built a floating shelf, loaded it with books, and within a month there’s a visible bow in the middle. The brackets are fine. The wall anchors are solid. The shelf itself is sagging — and that’s the problem most builders don’t think about until it’s too late.
Why Most Floating Shelves Sag
Sag happens when the shelf material flexes under load across the unsupported span. Gravity always wins. Three-quarter-inch plywood or MDF over 24 inches will visibly deflect under 30 pounds of books. The mounting hardware isn’t the weak link — the shelf itself is. If you focus on the brackets and ignore the shelf construction, you’ll end up with a well-mounted shelf that still sags in the middle.
The fix starts with choosing the right material and thickness for your span, then building the shelf to resist deflection before you ever drill into the wall.
Shelf Material and Thickness by Span
Under 18 inches: Standard 3/4-inch plywood or MDF handles books and moderate loads without issue. At this span, material choice matters less than mounting — even a pine board will hold up for years.
18 to 30 inches: Step up to 3/4-inch solid hardwood (oak, maple, walnut) or consider 1-inch plywood. MDF at this span will sag under anything heavier than decorative objects. Solid wood’s grain structure resists deflection better than the layered construction of plywood, and significantly better than the uniform density of MDF.
Over 30 inches: This is where most floating shelves fail. Two options: 1-inch-thick solid hardwood (minimum), or torsion box construction. For shelves over 36 inches carrying real weight — a row of hardcovers is about 25 pounds per linear foot — a torsion box is the right answer.
Torsion Box Construction for Long Spans
A torsion box is two face panels of thin material (1/4 to 1/2-inch plywood or MDF) bonded over an internal grid of strips. It’s the same principle behind hollow-core doors — remarkably rigid, surprisingly light, and capable of spanning 48 to 60 inches without visible deflection under heavy loads.
Build the internal grid from 1/2-inch strips of plywood or MDF, spaced 4 to 6 inches apart in a grid pattern. Glue and pin-nail the top face panel to the grid. Flip, glue and pin-nail the bottom panel. The result is a shelf that looks like solid wood from the outside (especially if you veneer or edge-band the exposed edges) but won’t sag under 50+ pounds even at 4-foot spans.
This is what custom furniture makers use for long floating shelves in built-in libraries. It takes an extra hour of shop time compared to a plain plywood shelf, but the difference in performance is dramatic.
French Cleat vs Brackets — The Mounting Method
French cleat: A 45-degree bevel strip screwed to the wall, with a matching bevel strip attached to the back of the shelf. The shelf hooks over the wall strip and locks in place. This is the strongest mounting method for floating shelves because it distributes the load along the entire back edge of the shelf rather than concentrating it at two or three bracket points. Ideal for heavy shelves and long spans.
Concealed brackets: Metal rods or arms that insert into holes drilled in the back edge of the shelf. Simpler installation, clean look, appropriate for lighter loads. Most commercial floating shelf hardware uses this approach. Fine for decorative shelves and light objects — not sufficient for a 36-inch shelf full of hardcover books.
For either method: mount into studs whenever possible. If you must use drywall anchors, toggle bolts are the only option that holds meaningful weight — rated at 50-75 pounds per bolt in 1/2-inch drywall. Plastic expansion anchors are not suitable for floating shelf loads.
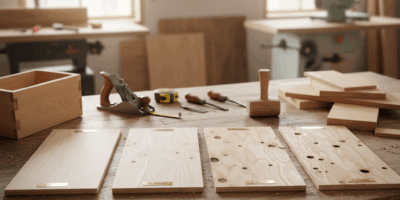
The Complete Build Process
Step 1: Measure the span and estimate the load. A row of paperback novels is about 15 pounds per linear foot. Hardcovers are 20-25 pounds. Art books and reference volumes can hit 30-35 pounds per foot. Be honest about what’s going on the shelf.
Step 2: Select material and construction method based on span and load. Under 24 inches and light load? Solid 3/4-inch hardwood with brackets. Over 30 inches or heavy books? Torsion box with a French cleat.
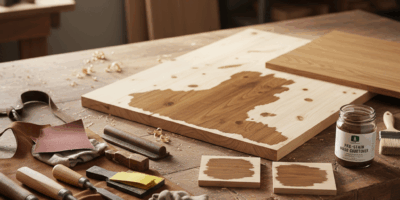
Step 3: Build the shelf to spec. Sand, finish, and let the finish cure before mounting. A finish that’s still tacky will stick to the wall surface and make future adjustments miserable.
Step 4: Install the mounting system. Level is non-negotiable — use a 4-foot level or a laser level for long shelves. A shelf that’s 1/8-inch off level looks fine up close but obviously crooked from across the room.
Step 5: Load test before putting your collection on it. Stack some weight on the shelf — a few heavy books, a bag of salt — and leave it for 24 hours. Check for any deflection. If the shelf shows zero movement under test load, it’ll hold up for years under actual use.

Stay in the loop
Get the latest classic custom wood furniture updates delivered to your inbox.