
There’s a moment in every woodworking project where you stop building and start shaping. The joinery is done, the glue has cured, and now you’re staring at a piece that’s structurally sound but visually… flat. That’s where hand-cut chamfers change everything.
A chamfer is just an angled cut along an edge. Simple concept. But when you do it by hand instead of running it through a router, the results feel completely different. The slight irregularities catch light in ways that machine-cut edges never will. And honestly, it’s one of the fastest ways to make a project look like it came from a real workshop instead of a factory.
Why Hand Chamfers Beat Router Chamfers
Routers are great tools. Nobody’s arguing that. But they produce perfectly uniform edges, and perfection can actually work against you in custom woodwork. Hand-cut chamfers have subtle variation that your eye reads as “crafted.” The width might shift by a hair over a long run. The angle might soften slightly near the ends. These aren’t flaws. They’re signatures.
The other advantage is speed. Setting up a router, finding the right bit, adjusting the depth, running test cuts — by the time you’ve done all that, you could have chamfered every edge on the piece with a block plane.
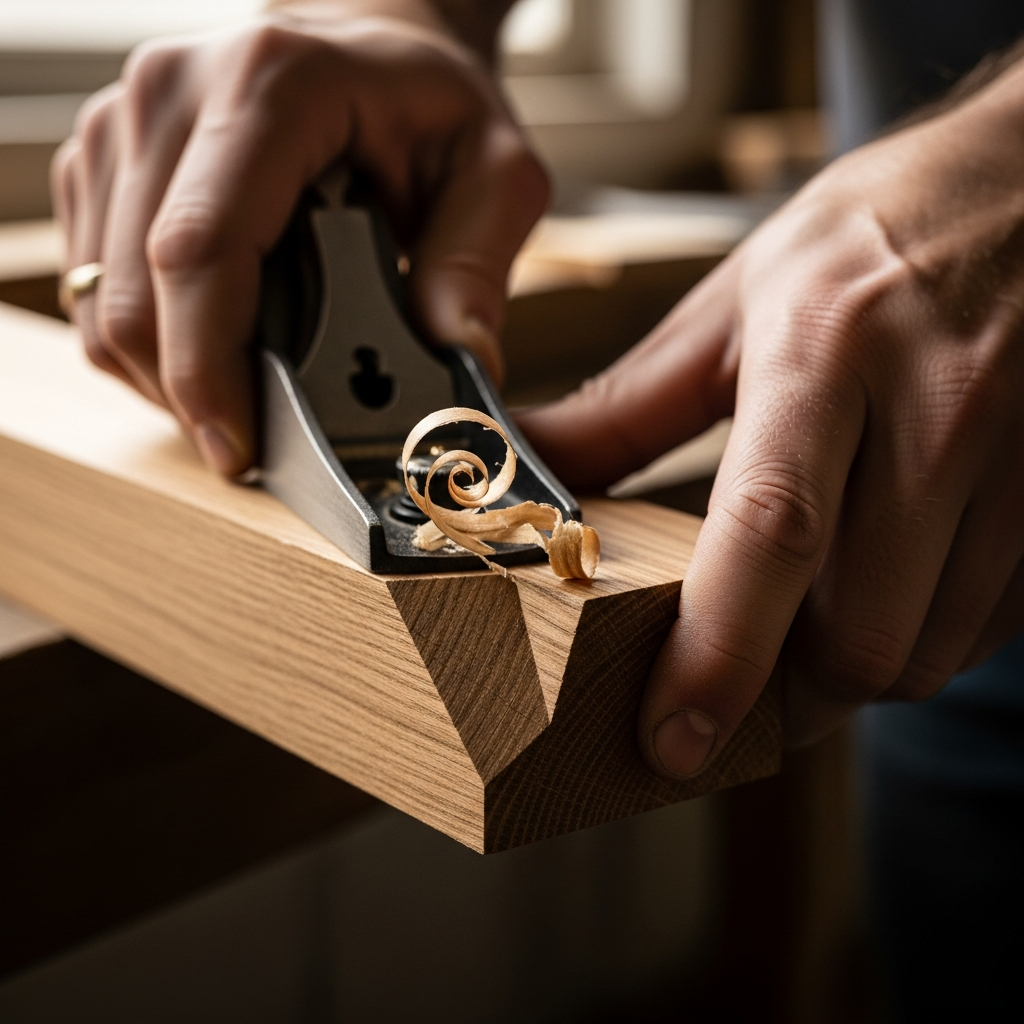
The Block Plane Method
Grab a low-angle block plane. A Stanley 60-1/2 or any equivalent works perfectly. Set the blade for a thin shaving — you want to see through it when you hold it up to light.
Hold the plane at roughly 45 degrees to the edge. Don’t overthink the angle. Your hands will find a natural position after two or three strokes. Take long, smooth passes from one end to the other. Three to five passes usually gives you a chamfer that’s wide enough to see and feel but not so wide that it looks like you were trying to remove material.
The key is consistent pressure. Press down evenly through the entire stroke. If you press harder at the start, you’ll get a wider chamfer on one end. Some people like that as a deliberate taper, but if you want uniformity, keep steady hands.
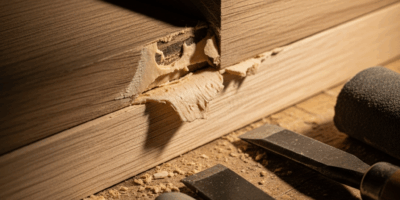
End Grain Chamfers
End grain is where most people mess up. The plane wants to tear out the fibers instead of slicing them cleanly. Two fixes work well.
First, skew the plane. Instead of pushing straight along the edge, angle the plane body about 20 degrees. This changes the cutting action from chopping to slicing, and end grain responds much better to a slicing cut.
Second, work from both ends toward the middle. Take a stroke from the left side halfway across, then flip and come from the right. This prevents blowout at the far edge where the fibers have nothing to support them.
Choosing Where to Chamfer
Not every edge needs a chamfer. The general rule is to chamfer edges that people will touch or see up close. Table edges, drawer fronts, shelf lips, cabinet face frames — these all benefit. Back edges, hidden joints, and structural members inside a cabinet? Leave them sharp or just break the edge with a quick swipe of sandpaper.
One place chamfers really shine is on through-tenon joints. If you’re letting a tenon poke through the surface of a piece, chamfering the exposed end turns a structural joint into a decorative feature. It draws the eye and says “this was done on purpose.”
Finishing Chamfered Edges
After cutting, run one pass of 220-grit sandpaper along the chamfer to knock off any fuzz. Don’t round it over. The whole point of a chamfer is that clean, flat angle. If you sand too aggressively, you’ll turn it into a roundover and lose the crisp shadow line that makes chamfers look sharp.
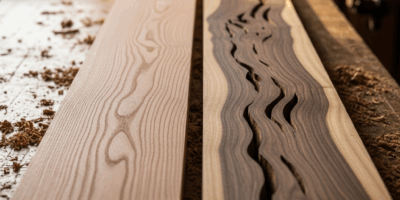
When you apply finish, chamfered edges absorb stain and oil differently than flat surfaces because you’ve exposed wood fibers at a different angle. On lighter woods like maple or ash, this can create a subtle contrast line. On darker woods like walnut, the effect is less visible but the tactile difference is still there.
Hand-cut chamfers take about thirty seconds per edge. The payoff in visual quality is enormous. Next time you’re tempted to reach for the router, try the block plane first. Your projects will thank you.

Stay in the loop
Get the latest classic custom wood furniture updates delivered to your inbox.