Why Wood Stain Goes on Uneven in the First Place
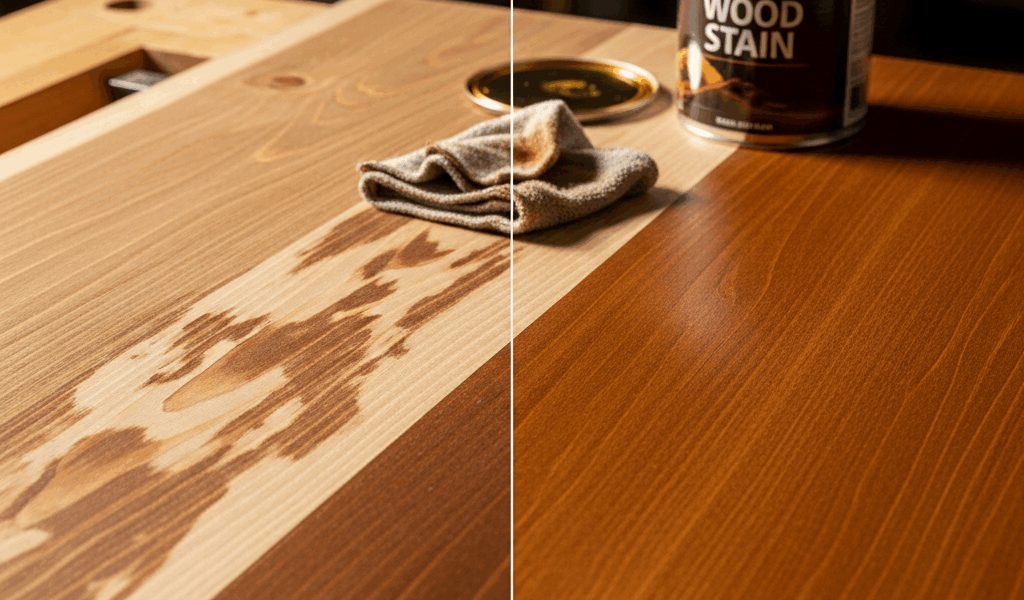
Wood staining has gotten complicated with all the conflicting advice flying around. But the actual problem — why stain goes on blotchy — is predictable once you see it for what it is. Stain works by soaking into open wood grain. Anything that blocks, speeds up, or redirects that absorption creates blotching, streaking, or those maddening pale patches that a second coat won’t fix. A third coat won’t either.
The surface is never as uniform as it looks. One spot has mill glaze — soaks up nothing. End grain drinks stain like a dry sponge and turns nearly black. Sand one section with 100-grit and the next with 150-grit and they’ll color differently, every single time. Once you accept that stain absorption depends entirely on exposed grain structure and surface cleanliness, the fixes stop feeling like guesswork.
The Most Common Causes of Uneven Stain Absorption
Sanding with the Wrong Grit or Inconsistent Grits
I’ve watched this mistake ruin otherwise careful projects. Sand part of a board with 100-grit, finish with 150-grit, and the 100-grit section opens the grain wider — drinks stain darker. The result is a visible line or blotchy pattern that catches light at certain angles. It looks terrible. And it’s completely avoidable.
Pick one final grit and use only that across the entire piece. For staining, 120–150 is standard. 100-grit leaves deep scratches that telegraph through stain — you’ll see them. Go finer than 150 and you risk burnishing the grain closed, which blocks absorption. Stay consistent. That’s it.
Mill Glaze on Unplaned Lumber
Factory-milled boards come off the line with a compressed surface layer from high-speed planing. That mill glaze is thin but stubborn — it blocks stain effectively. Skip the sanding step or only spot-sand and you’ll get pale, non-absorbent patches wherever that glaze survived.
Softwoods pick this up worse. Pine and larch hold mill glaze far more than hardwoods. You have to sand it off — start with 100-grit if the glaze is heavy, finish with 120–150. No shortcuts exist here, honestly.
Previous Finish or Sealer Residue
Common when restaining old furniture or working with reclaimed wood. Old polyurethane, paint, even a dust coating from a prior project sits on the grain and blocks stain. You might strip most of it and miss spots in corners, grain valleys, or edges.
The symptom is unmistakable — stain absorbs everywhere except those small zones. Touch suspicious spots with your fingernail before staining. Feel anything slick or sticky? Strip it. A cloth dampened with mineral spirits lifts residue without full chemical stripping. Once it’s gone, sand lightly with 150-grit to re-open the grain.
Wood Species with Naturally Irregular Grain Density
Probably should have opened with this section, honestly — it changes prep strategy before you even buy stain. Some woods are blotch-prone by design. Pine, cherry, birch, and maple have grain density that swings wildly within the same board. Soft earlywood zones drink stain faster and darker than hard latewood right beside them.
These species need pre-stain wood conditioner. It partially seals the grain and evens out absorption. Apply it, wait the recommended time — usually around 15 minutes — then stain normally. This single step eliminates blotching on the vast majority of cherry and pine projects. It’s not optional on those species. It’s just part of the process.
End Grain Soaking Too Much Stain
End grain — the exposed wood at board edges and cut surfaces — is cross-grain fiber. It drinks stain aggressively and darkens to near-black while the face stays lighter. Looks like a mistake. Looks like two different colors were applied.
Seal end grain before staining. A thin coat of pre-stain conditioner, diluted stain, or thinned shellac stops the excess absorption. Let it dry, then stain normally. End grain will still read slightly darker — it should — but not the jarring contrast you get when it’s left untreated.
How to Fix Blotchy Stain Before It Dries
Caught it while the stain is still wet? Depending on temperature and stain type, you have maybe 5–20 minutes. Move fast.
Wipe it back immediately. Grab a clean cotton cloth — not a synthetic rag — and wipe the entire surface with the grain. You’re pulling excess stain off and evening out what soaked in. Use steady, even pressure. Light areas darken slightly, dark areas lift slightly. You’ll meet somewhere in the middle.
Use mineral spirits to feather blotchy edges. If one section absorbed and the adjacent section didn’t, a cloth dampened with mineral spirits can blend the line. Works best in the first 10 minutes. The spirits thin the stain just enough to let it re-flow and level across the transition.
Know when to stop. Severe blotchiness after two wipe attempts means you’re chasing the problem. Let it dry and strip it. Over-working wet stain makes streaking worse — that’s what makes the situation more frustrating. Don’t make my mistake of trying to fix it one more time. You’ll regret it.
How to Strip and Restain Wood the Right Way
The stain dried unevenly and wiping didn’t help. Two options: chemical stripper or sanding back to bare wood.
Chemical stripper — products like Citristrip or Klean-Strip — dissolves stain without removing wood fiber. Slower than sanding, but safer for thin boards or complex joinery. Apply per label, wait 20–30 minutes, scrape with a plastic scraper, wash down with mineral spirits. Drawback: messy, and some oil-based stains don’t lift fully on the first pass.
Sanding back removes stain and a thin wood layer simultaneously. Start with 80-grit to strip, move to 100-grit to smooth. Faster than chemical stripping — generates a lot of dust. Sand with the grain. Cross-grain scratches at this stage will show through the new stain coat.
After stripping by either method, the grain will raise slightly. The wood is wet or freshly exposed — either way, let it dry completely. Then sand lightly with 150-grit to knock down the raised grain. Skip this and the new stain coat goes on rough.
Now prep correctly. Apply pre-stain conditioner on blotch-prone species — pine, cherry, birch, maple. Wait the full 15 minutes. Stain normally. Wipe evenly. Let dry. The difference is visible immediately.
How to Prevent Uneven Stain Absorption Next Time
Prevention is faster than fixing. That’s not a cliché — stripping and re-sanding a project costs two or three hours. The right prep costs twenty minutes.
- Sand the entire piece with a single final grit — 120–150 is the range. Random-orbit sander for flat faces, hand-sand edges and curves so you don’t round them over.
- Wipe down with a tack cloth or lightly damp cotton rag after sanding. Remove every bit of dust. Let it dry completely before doing anything else.
- On blotch-prone species, apply pre-stain conditioner and wait the full recommended time — not a partial wait.
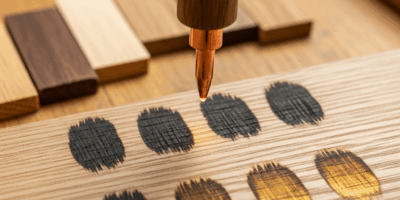
- Test stain on a scrap piece of the same board. Same species, same surface prep. You’ll see the actual color result and catch absorption problems before they hit the main project.
- Apply stain with a brush or cotton cloth in thin coats. Wipe-on, wipe-off after 5–10 minutes gives far more control than flooding the surface.
- Seal end grain with conditioner or diluted stain before the main coat goes on.
Uneven stain absorption isn’t a finishing problem — it’s a prep problem every time. The wood surface determines the result. Get the surface right, and stain absorbs evenly. That’s what makes the prep work so worth doing.


Stay in the loop
Get the latest classic custom wood furniture updates delivered to your inbox.