Blotchy stain issues have gotten complicated with all the conflicting advice on forums and YouTube flying around. As someone who has ruined more than a few pieces with blotchy stain before figuring out the solution, I learned everything there is to know about pre-stain wood conditioner and why it matters. Today, I will share it all with you.
Why Wood Stains Blotch in the First Place
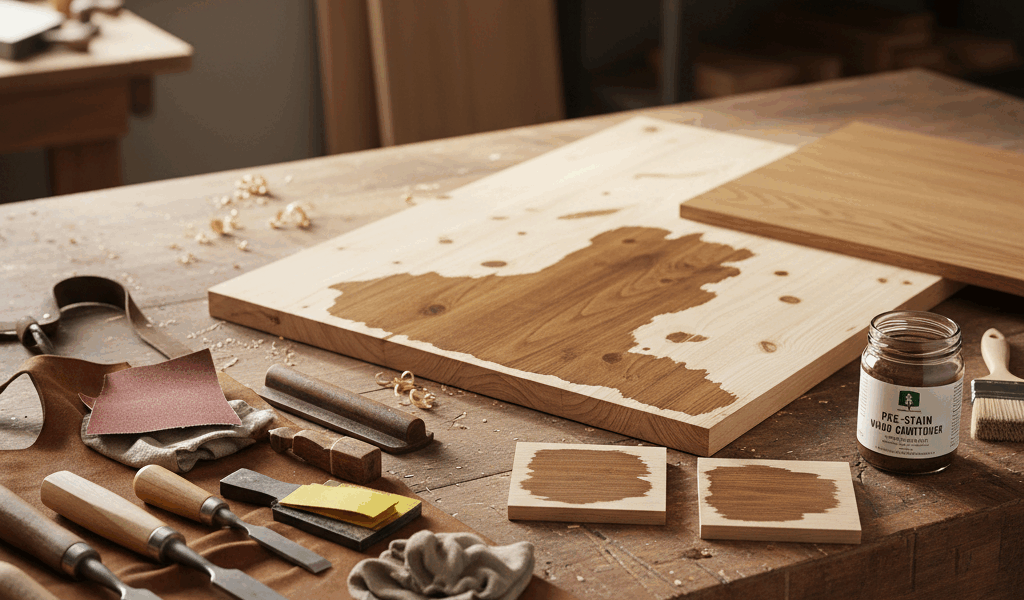
Here is the deal. Not all wood absorbs stain at the same rate across its surface. Some areas have tighter grain. Some areas have more end grain exposed. Some spots are just softer than others. When liquid stain hits these inconsistent surfaces, it soaks in unevenly. The result is dark splotches next to light patches, and the overall look is muddy and unprofessional.
I remember staining a pine bookcase early in my woodworking journey. I brushed on a gorgeous golden oak stain expecting warmth and beauty. What I got looked like a leopard with a skin condition. Dark blotches everywhere. No amount of wiping fixed it. That was the day I learned about wood conditioner, and I have never stained a blotch-prone species without it since.
Types of Pre-Stain Conditioners
Probably should have led with this section, honestly. There are several approaches to controlling stain absorption, and the best one depends on your project.
Commercial wood conditioners like Minwax Pre-Stain are the easiest option. You brush it on, wait the recommended time — usually five to fifteen minutes — and then apply your stain while the conditioner is still slightly active. The conditioner partially seals the pores so stain absorption is more uniform. It works well for most situations.
A thin coat of shellac — what finishers call a wash coat — does the same job and gives you more control. I mix a one-pound cut of shellac and brush it on, let it dry, and then stain over it. The shellac seals the open pores while leaving the tighter grain areas relatively untouched. This evens out the absorption beautifully. I prefer this method on fine furniture because I can dial in exactly how much sealing I need.
Gel stains are another approach entirely. Instead of being a liquid that soaks in, gel stain sits on the surface like a paste and you wipe it to the desired color. Because it does not penetrate deeply, it does not blotch. The tradeoff is that you lose some of the grain depth you get with penetrating stains. But for blotch-prone woods, the color consistency is worth it.
Application Process That Works Every Time
Apply conditioner evenly with a brush or cloth. Cover the entire surface — do not miss spots or you will see the difference. Wait the recommended time on the label. This is usually between five and fifteen minutes. Here is the key timing detail that trips people up: apply your stain before the conditioner dries fully. The conditioner needs to still be partially active to do its job of controlling absorption.
Wipe your excess stain promptly after application. Do not let it sit for twenty minutes hoping for a darker color. On conditioned wood, longer sit times lead to uneven results because the conditioner is breaking down at different rates across the surface. Quick, consistent wipe-off is the move.
That’s what makes wood conditioning endearing to us finishers — it takes a frustrating, unpredictable process and makes it reliable.
Woods That Absolutely Need Conditioning
Pine is the worst offender. The soft earlywood between the grain lines soaks up stain like crazy while the harder latewood resists it. Every pine project I stain gets conditioned. No exceptions.
Cherry develops dark spots and blotches that look terrible with penetrating stain. This is a shame because cherry is a gorgeous wood. Conditioner or gel stain solves the problem completely. I actually prefer to let cherry darken naturally with sunlight exposure rather than staining it, but when a client wants a specific color, conditioner is essential.
Maple shows uneven color because of its tight but inconsistent grain pattern. Curly or figured maple is even worse. Birch requires treatment for similar reasons — the grain density varies enough to cause visible blotching.
Test on scrap before you commit. Always. I keep offcuts from every project specifically for finish testing. Five minutes of testing beats hours of sanding off a bad stain job.


Stay in the loop
Get the latest classic custom wood furniture updates delivered to your inbox.