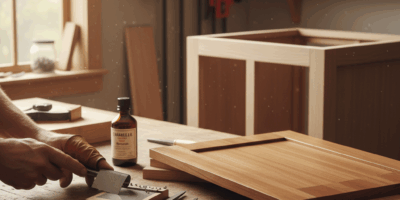
How to Hang Shelves Without Brackets
How to Hang Shelves Without Brackets
Hanging shelves without visible brackets presents a sleek, modern look. These types of shelves, often referred to as floating shelves, provide a clean aesthetic while still offering functionality. They are perfect for displaying books, decor, and other household items. Here’s a step-by-step guide to help you install them successfully.

Tools and Materials You’ll Need
- Floating shelf kit with hidden brackets
- Drill and appropriate drill bits
- Screwdriver or a power driver
- Level
- Tape measure
- Pencil
- Stud finder (optional but recommended)
- Wall anchors (if not drilling into studs)
Step 1: Choose and Measure the Location
Decide where you want to install your floating shelf. Use a tape measure to determine the exact placement, both horizontally and vertically. Mark the positions lightly with a pencil. Ensure the shelf will be level by using a spirit level on the marks.
Step 2: Locate Wall Studs (If Possible)
Use a stud finder to locate studs behind the wall. Mark their locations with a pencil. Attaching the shelf to studs provides maximum support, especially if you plan to place heavy items on it. If no studs are available, plan to use wall anchors for stability.
Step 3: Mark and Drill Holes
Place the floating shelf’s backplate against the wall, aligned with your pencil marks. Mark the positions of the screw holes on the wall. Drill pilot holes where you’ve marked. If drilling into a stud, use a bit slightly smaller than the mounting screws. If using wall anchors, drill a hole the size of your wall anchors.
Step 4: Install Wall Anchors (If Needed)
If you’ve drilled into drywall and not a stud, insert wall anchors into the drilled holes. Use a hammer to gently tap them flush with the wall surface. This step ensures the screws will hold securely.
Step 5: Attach the Backplate
Position the backplate against the wall, aligning it with the pilot holes or anchors. Drive the screws through the backplate into the wall using a screwdriver or power driver. Ensure each screw is tight but avoid over-tightening, which can strip the screw holes.
Step 6: Mount the Shelf
Slide the shelf onto the backplate. This may vary depending on the shelf design; some require the shelf to slide onto rods protruding from the backplate, while others may need screws underneath for extra security. Confirm that the shelf is level once attached. Make minor adjustments if necessary.
Step 7: Test the Shelf
Before placing any items on the shelf, test its stability. Apply gentle pressure to ensure it stays securely in place. If the shelf wobbles, recheck all screws and anchors for tightness.
Tips for Success
- Always check your shelf’s weight limit before purchasing and installing. Match the shelf and hardware to your intended use.
- Consider the type of wall you have (drywall, plaster, brick) and select appropriate anchors and screws.
- If multiple shelves are being installed, maintain even spacing and ensure they are all aligned.
- Plan your layout in advance by measuring and marking where everything should go.
Common Mistakes and How to Avoid Them
- Skipping the stud finder can lead to improperly secured shelves. If you don’t have one, use heavy-duty wall anchors.
- Improper leveling can result in tilted shelves. Always use a level when marking your placement.
- Overloading can cause the shelf to fail. Respect the weight limit of the hardware and material.
Maintenance Tips
- Periodically check the screws and backplate for any signs of loosening or damage.
- Dust the shelf regularly to keep it looking sharp and to prevent dirt buildup in the mounting mechanism.
- Avoid placing extremely heavy items on floating shelves to ensure longevity.
Hanging shelves without brackets can provide a flawless look to your space. They offer practical storage and display solutions. Following these steps will help you achieve a professional-looking result.


