Hand-cut dovetail joints have gotten complicated with all the jig systems and technique debates flying around. As someone who cut my first dovetails twenty years ago and has been refining the process ever since, I learned everything there is to know about layout, sawing, and fitting these iconic joints. Today, I will share it all with you.
The Types of Dovetails
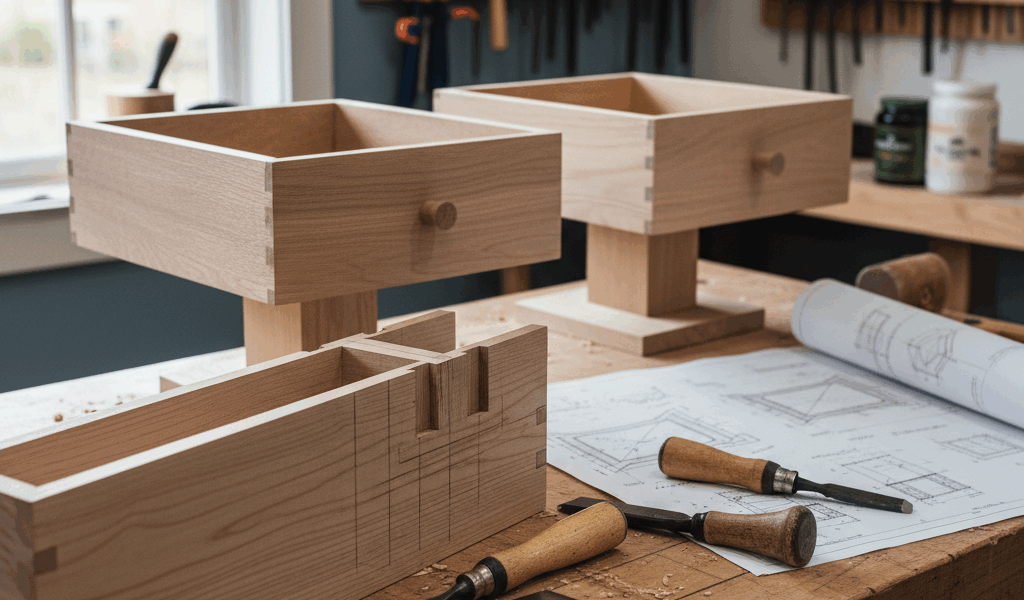
Through dovetails are the classic. Both the tails and pins show on the outside of both boards. This is the joint you see on traditional drawer sides, blanket chests, and tool chests. It is strong as anything and looks fantastic in contrasting woods. Most of my hand-cut practice has been on through dovetails, and they are what I recommend learning first.
Half-blind dovetails hide the joint on one face. Drawer fronts are the most common application — you see the dovetails from the side but not from the front. This takes a bit more skill because you are cutting a stopped socket that does not go all the way through.
Secret or full-blind dovetails are completely hidden from the outside. More work and more fussy to fit, but they are what you use for fine boxes where you want clean surfaces on every face with mechanical strength hidden inside. That’s what makes hand-cut dovetails endearing to us woodworkers — they combine real structural integrity with craftsmanship you can see and admire.
Layout — Where Precision Begins
Probably should have led with this section, honestly. Your layout determines everything about how the joint turns out.
Tails first is the traditional approach and what I teach. Mark your tails on the tail board, cut them, then transfer the marks directly to the pin board using the cut tails as a template. This method works beautifully because any slight imperfections in your tail cuts get transferred to the pin board, so the joint fits itself.
Pins first works too, and some highly respected woodworkers prefer it. Neither way is wrong — it is mostly a matter of personal preference and which process makes more sense to your brain. Try both and commit to whichever clicks for you.
Spacing is an aesthetic choice. Evenly spaced, uniform-size dovetails look clean and machine-like. Varying the sizes — wider pins with narrower tails or vice versa — has a handmade charm that signals this was made by a person, not a jig. I tend to vary my spacing slightly because I like that hand-worked look.
Angles between one-to-six for softwoods and one-to-eight for hardwoods are the standard recommendation. Steeper angles in softwood give the joint more mechanical lock. Shallower angles in hardwood look more refined and are easier to cut cleanly in dense material.
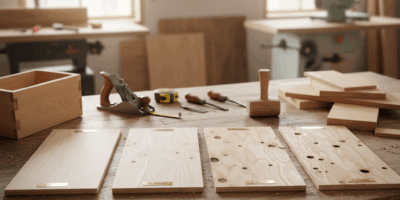
Cutting — Steady Hands and Sharp Saws
Saw to the line. On the waste side. This sounds simple and it is, but it requires practice to consistently split a knife line with a saw kerf. A sharp dovetail saw with a thin kerf helps enormously. I use a Japanese dozuki for most of my dovetail sawing because the pull stroke gives me better control, though many excellent woodworkers prefer a Western-style saw.
Chop the waste between the tails with a chisel. Work from both faces to avoid blowout on the back side. Start your chisel cuts slightly away from the baseline, then pare back to exact position. If you chisel right to the line on your first chop, you will likely go past it because the chisel follows the grain.
Transfer your marks carefully from the cut tails to the pin board. Use a knife — not a pencil — for maximum accuracy. The knife line gives you a registration groove for your saw to ride in. Accuracy in this transfer step determines whether your joint fits tightly or has visible gaps.
Pare to the final fit with a sharp chisel. Sneak up on the line. Taking material off is easy. Adding it back is impossible.
Getting Good — The Real Talk
Practice in softwood first. It is cheaper and more forgiving of sawing errors. Pine is my practice wood of choice because the contrast between early and late wood makes it easy to see your cuts.
Do one set a day. Fifteen minutes of focused practice. Improvement happens faster than you might think. By your tenth set, you will see a dramatic difference from your first. By your fiftieth, you will be cutting joints you are actually proud of.
Your first ones will be ugly. Everyone’s are. My first dovetails had gaps you could see from across the room. I kept them as a reminder. Keep going. The skill is in your hands waiting to come out with practice.


Stay in the loop
Get the latest classic custom wood furniture updates delivered to your inbox.