
Tung oil finishes have gotten complicated with all the marketing spin and fake tung oil products flying around. As someone who has been applying pure tung oil to furniture and cutting boards for years, I learned everything there is to know about getting a beautiful, durable result. Today, I will share it all with you.
Why Pure Tung Oil Is Worth the Effort
Let me say this upfront. Real tung oil is not the same as “tung oil finish” from the hardware store. That stuff is usually just varnish with some tung oil mixed in. Pure tung oil is a penetrating finish that soaks into the wood fibers and hardens from within. It enhances the grain in a way that film-building finishes cannot touch.
It is food safe once fully cured, which makes it a go-to for cutting boards, salad bowls, and butcher block counters. It is naturally water resistant without sitting on top of the wood like polyurethane. That’s what makes tung oil endearing to us woodworkers who love natural finishes — it protects the wood while still letting it look and feel like wood.
The stuff has been used in Asia for thousands of years on boats and furniture. If it lasted centuries on Chinese junks, it will handle your coffee table just fine.
Application Method — The Right Way
Probably should have led with this section, honestly. The application process is where most people go wrong, and I was one of them the first time I tried it.
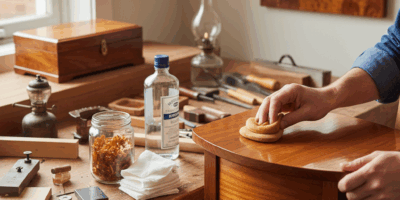
Thin your first coat significantly. I use a fifty-fifty mix of tung oil and citrus solvent for the first coat. This thins the oil enough to really penetrate deep into the wood fibers. Straight tung oil is thick and will just sit on the surface looking like a mess.
Flood the surface and let it penetrate. Give it fifteen to twenty minutes to soak in. Then — and this is critical — wipe off every bit of excess before it starts to get tacky. If you leave puddles of tung oil on the surface, they will dry into a sticky, wrinkled disaster. I ruined a nice cherry tabletop my first time because I did not wipe thoroughly enough. Learned that lesson fast.
Sand lightly between coats with three-twenty grit or finer. This knocks down any raised grain and gives the next coat something to grip. Do not skip this step. The difference between a good tung oil finish and a great one is in the between-coat sanding.
Coat Schedule — Patience Pays Off
Multiple thin coats build real protection. I typically do five to seven coats on a tabletop. That sounds like a lot, and it is. But each coat only takes about fifteen minutes of actual work time. The waiting between coats is what eats up the calendar.
Allow a full cure between coats. With pure tung oil, that means at least twenty-four hours between applications, and honestly forty-eight is better. Each successive coat can be slightly less thinned. By the fourth or fifth coat, I am using straight tung oil because the pores are already sealed and the oil sits closer to the surface where you want it for the final build.
The final coats can be buffed to a soft satin sheen that is gorgeous. I use a white Scotch-Brite pad for the final buffing. It brings up a gentle glow without adding any scratch marks.
Curing Notes — The Waiting Game
Here is the part nobody wants to hear. Full cure on pure tung oil takes weeks. Not days. Weeks. I tell customers thirty days before putting hot dishes or wet glasses on a tung-oiled surface. Is that annoying? Absolutely. Is it worth it for the finish quality? Every time.
Heat and light actually accelerate the curing process. Setting a freshly oiled piece in a warm room with good airflow makes a noticeable difference. I have a curing rack near a south-facing window in my shop for exactly this reason.
If the curing time is a dealbreaker for your project, look into polymerized tung oil. It has been heat-treated to partially cure before it even goes in the can. It builds faster and cures in about a week instead of a month. The tradeoff is that it does not penetrate quite as deeply, but for most applications the difference is minimal.


Stay in the loop
Get the latest classic custom wood furniture updates delivered to your inbox.