
How to Build a Live Edge Table — From Raw Slab to Finished Piece
Learning how to build a live edge table is one of those projects that sounds romantic until you’re standing in a dusty sawmill at 7 a.m., trying to figure out why a gorgeous walnut slab costs $900 and whether it’s worth it. I’ve been building custom live edge furniture professionally for over a decade, and I still get that same knot in my stomach every time I commit to a slab. The decisions you make before you ever touch a saw or a router are the ones that determine whether you end up with a showpiece or an expensive mistake. This guide covers everything I actually do — including the parts most tutorials skip entirely.
Choosing the Right Slab
Most people start their live edge table search on Craigslist or at a big-box hardwood dealer. Nothing wrong with that. But if you want a genuinely remarkable slab, you’re better off finding a regional sawmill or a lumber dealer who specializes in figured wood. In the Pacific Northwest, I source most of my material from a mill that sells by the board foot and lets you walk the yard. Prices vary wildly — figured black walnut runs $15 to $35 per board foot right now, while big-leaf maple can go anywhere from $8 to $20. White oak sits in the middle. For a dining table that’s 84 inches long and 36 inches wide, you’re typically looking at 30 to 50 board feet depending on thickness, which means budgeting $400 to $1,200 just for the raw slab before you do anything to it.
Species to Consider
Black walnut is the standard. Rich chocolate color, works beautifully, finishes without much fuss. It’s also what every client asks for by name, which drives up the price. If budget is a real concern, consider big-leaf maple — the figured stuff, with the curl or quilt pattern, is genuinely stunning and often cheaper. White oak has become extremely popular in the last five years, and for good reason: it’s stable, the grain is tight, and it pairs well with both metal and wood bases. Cherry darkens dramatically with UV exposure and looks incredible after a year or two. Elm has wild, interlocking grain that makes it tricky to flatten but extraordinary to look at.
Moisture Content — the Thing Everyone Ignores
Probably should have opened with this section, honestly. Moisture content is the single most common reason live edge tables crack, warp, or develop gaps after delivery. You want the slab at or below 8% moisture content for interior furniture. I use a Lignomat Mini-Ligno S/D pin-type moisture meter — it runs about $120 on Amazon and it’s accurate enough for this work. Green or partially dried slabs are cheaper. I’ve bought them and regretted it. A slab at 18% moisture content looks completely fine the day you buy it. Six months later, after it’s been sitting in a heated home, it’s moved an inch across the width and opened up a crack you didn’t plan for.
Ask the seller directly how long the slab has been drying and under what conditions. Air-dried lumber dries roughly one inch of thickness per year. A 3-inch-thick slab that was cut two years ago probably isn’t ready. Kiln-dried slabs cost more but take the guesswork out of it. When in doubt, buy dry.
Checking for Hidden Cracks and Structural Issues
Before you commit, get your hands on the slab. Run your fingers across the surface and feel for cracks that aren’t visible from standing height. Bring a flashlight and angle it low across the face — this raking light technique shows surface checks that are invisible under flat light. Tap the slab with your knuckle across its entire surface. A hollow sound indicates an internal void or delamination between growth rings, which can be a serious structural problem or just a cosmetic void depending on depth.
Look at the end grain. Checks (radial cracks) at the ends are nearly universal and not a dealbreaker — you’ll typically lose 2 to 4 inches off each end when you make your final cuts. Deep checks that run more than 12 inches into the slab are a different story. Decide ahead of time whether you can work around them or use bow ties to stabilize them as a design feature.
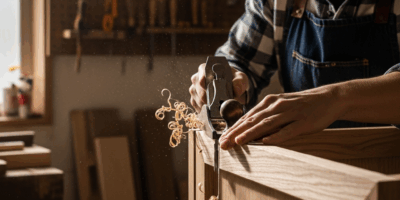
Flattening a Slab Without a Wide Planer
Here’s where most tutorials either gloss over the process entirely or assume you have access to a 24-inch wide drum planer. You don’t. Neither do most woodworkers. A router sled is the answer, and it’s the method I use for virtually every slab I build.
Building a Router Sled
A router sled is essentially a set of parallel rails — straight and level — that your router travels across on a perpendicular track. The router, fitted with a surfacing bit, removes material in overlapping passes until the entire surface is flat. It sounds simple because it is, but the setup requires precision.
My sled uses two lengths of 1.5-inch steel square tube, each 10 feet long, clamped to a pair of sawhorses. The slab sits below them, shimmed until it’s stable and not rocking. The router carriage is a piece of 3/4-inch Baltic birch plywood with two hardwood runners that slide along the steel rails. I use a 1-3/4-inch Whiteside 6210 spoilboard surfacing bit — it cuts a wide swath and stays sharp. The whole sled setup cost me about $80 in materials the first time I built it. I’ve since rebuilt it twice with minor improvements.
Checking for Twist and Cup Before You Start
Before touching the router, figure out exactly what you’re dealing with. Winding sticks are the traditional tool — two straight sticks of equal length placed at each end of the slab. Sight across them from one end. Any difference in height between the corners tells you the slab is in twist (also called winding). Cup is easier to see — it’s a concave or convex curve across the width.
Shim the slab on your sled so the high points make contact with the support surface and the slab doesn’t rock. Do not shim it flat. You want it stable in its natural position so you’re referencing the router off a fixed plane. If you force the slab flat with shims and clamps, it’ll spring back to its warped shape the moment you release it.
For a heavily twisted slab, expect to remove a lot of material. I had an 8-foot elm slab last year that had nearly 3/4-inch of twist from end to end. You do the math — I lost a full inch of thickness just getting it flat. That’s why buying thick slabs (2.5 to 3 inches) gives you margin to work with. Most finished dining tables are 1.5 to 1.75 inches thick. You have room.
Running the Sled
Set your router depth to take no more than 1/8-inch per pass. Overlap each pass by about 40% of the bit diameter. Work systematically — left to right across the width, then advance the carriage along the length. Keep your router speed consistent. Stop periodically and clear the chips so you can see what you’re actually cutting.
After flattening the top face, flip the slab and repeat. Then run it through a thickness planer if you have access to one, or continue with the router sled on the second face. The goal is parallel flat surfaces within about 1/32 inch across the whole slab. Check with a straightedge in multiple directions — diagonal as well as along and across the grain.
Sanding starts at 80 grit with a random orbital sander. I use a Festool RO 150 E, but a DeWalt DWE6423K does the same job for a third of the price. Work through 80, 120, 150, and 180 grit. Don’t skip grits. Scratches from 80 that you cover with 150 will show under finish. Every single time.
Filling Voids and Bark Removal
This is the section that separates a $600 slab table from a $3,500 one. The way you handle the voids, cracks, and live edge detail determines the character of the finished piece.
When to Keep the Bark — and When to Remove It
Keeping the bark sounds appealing. It’s rustic, it’s natural, it shows the tree. Here’s the honest reality: bark adheres to the cambium layer with varying degrees of commitment depending on species, how long the slab has been drying, and conditions during storage. Walnut bark almost always needs to go — it shrinks, separates, and eventually falls off in chunks, taking finish with it. I’ve delivered three tables over the years with intact walnut bark. All three clients contacted me within two years about bark falling off. Now I remove it as a standard practice on walnut.
Big-leaf maple bark is thicker and more stable. Same with some oaks. For those species, I test the bark adhesion by pressing firmly with my thumb in several spots. If it moves or sounds hollow under light tapping, it comes off. If it feels solid and bonded, I’ll stabilize it with thin cyanoacrylate (CA glue) — Starbond EM-150 medium CA works well — wicked into any gaps between bark and wood with a fine-tip applicator. Then I overfill slightly, let it cure fully (24 hours minimum), and sand flush.
Removing bark is simple — a stiff putty knife and a rubber mallet. Work from the end toward the middle and let the tool follow the natural separation point. You’ll expose the raw, lighter-colored sapwood edge, which I sand smooth starting at 80 grit and finish to match the face.
Epoxy Void Fills
Epoxy fills have become the defining visual element of the live edge market over the last eight years. Black epoxy. Teal epoxy. Metallic gold. The trend is real and clients ask for it. But the technique matters more than the color choice.
For most structural and cosmetic fills, I use TotalBoat TableTop Epoxy or West System 105/205. They’re both bubble-resistant and self-leveling within their working time. TotalBoat’s TableTop system is slightly more forgiving for beginners. Mix according to the exact ratio — epoxy is unforgiving of eyeballed measurements. I use a kitchen scale accurate to 1 gram.
Tape the underside of the slab beneath any voids that go all the way through. Use painter’s tape backed by a piece of smooth packaging tape to prevent adhesion — epoxy sticks to everything except properly released surfaces. For deep voids more than 1 inch deep, don’t try to fill in one pour. Epoxy generates heat as it cures (exothermic reaction), and thick pours crack or yellow. Do it in 1/4-inch to 3/8-inch layers, letting each layer reach a gel stage before adding the next. This takes patience. I once rushed a 2-inch deep pour on a coffee table build and had a perfectly centered crack down the middle of the fill when I came back the next morning. Had to grind it out and start over.
Add colorant after thoroughly mixing Part A and Part B together — not before. Transparent pigments maintain some depth and visual interest. Opaque black is dramatic and popular with dark walnut. Metallic powders (Alumilite Amazing Pigments are good) create a liquid metal effect that photographs extremely well, which matters if you’re selling your work.
After full cure (typically 72 hours minimum before sanding), level the epoxy with a card scraper or 80-grit on a hard sanding block. The goal is flush with the wood surface. Then continue your normal sanding progression. Epoxy scratches easily at coarse grits, so spend extra time at 150 and 180 to make sure all cross-grain scratches are gone before finishing.
Bow Ties for Structural Cracks
A crack that runs across the grain — perpendicular to the length of the table — is a structural threat. Bow ties (also called butterfly keys or Dutchman joints) are the fix. Rout a mortise across the crack using a template and a spiral upcut bit, then glue in a contrasting wood bow tie that mechanically bridges the crack. I make mine from whatever scraps create visual contrast — black walnut bow ties in a maple slab look sharp. The size depends on the crack: a minor check gets a 4-inch bow tie; a significant crack running halfway across the slab might need two 6-inch keys spaced along its length.
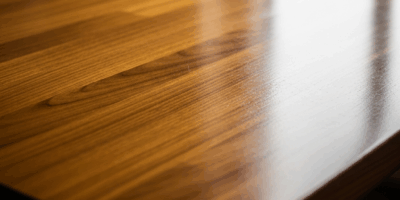
Finishing a Live Edge Table
The finish is what protects everything you’ve built and determines how the table looks in someone’s home every single day. Get this wrong and you undermine all the work that came before it.
Understanding Your Options
Three finishes dominate the live edge market: oil/varnish blends, polyurethane, and hardwax oil. Each has a legitimate place. Here’s how I think about them.
Oil/varnish blends — Waterlox Original Sealer/Finish is the one I use most — penetrate the wood rather than sitting on top of it. The result is a natural, low-sheen surface that feels like wood rather than plastic. It enhances grain depth beautifully, especially on walnut. The tradeoff is durability. An oiled table requires annual maintenance — a light recoat keeps it looking good. It’s easy to repair: scuff, clean, and apply another coat over the damaged area. For clients who appreciate natural materials and are willing to maintain furniture like they maintain other quality objects in their lives, this is my recommendation.
Polyurethane builds a hard film on the surface. It’s the most durable option against water rings, scratches, and daily abuse. Water-based poly (General Finishes High Performance is excellent — about $55 per quart) dries clear and doesn’t amber, which matters on light-colored woods like maple. Oil-based poly ambers noticeably, which actually enhances walnut and cherry. Apply thin coats, sand with 320 grit between coats, and plan on three to four coats minimum on a dining table. The film finish look isn’t for everyone, but clients with young children usually end up here.
Hardwax oil — Rubio Monocoat is the product I specify most often — is the current professional standard for high-end furniture. One coat bonds molecularly with the wood fibers and requires no sanding between coats because there’s only one coat. It dries quickly, is extremely easy to spot-repair, and produces a finish that looks completely natural while offering real protection. It’s expensive ($90 to $120 for a small can) but a little goes a long way. I’ve converted most of my clients to Rubio over the last four years. The maintenance story is simple: if the surface looks dry or gets a scratch, apply Rubio Refresh Spray and wipe it in. Done.
Application Process That Actually Works
Whatever finish you choose, surface preparation is what the result depends on. Final sanding at 180 grit, then raise the grain deliberately — wipe the entire surface with a damp cloth, let it dry completely, and sand lightly at 220. This prevents the first coat of any water-based finish from raising the grain and leaving you with a rough texture.
For hardwax oil, apply with a white 3M Scotch-Brite pad, working the product into the grain in a circular motion, then wiping off all excess after 3 to 5 minutes. This is critical — any hardwax oil left on the surface instead of absorbed into it will cure as a sticky film. Buff dry with a clean cotton cloth. Allow 24 hours before light use, 72 hours before full use.
For polyurethane, use a high-quality foam roller for flat sections and a good synthetic brush for edges and the live edge contours. Thin the first coat 10% with the appropriate solvent to improve penetration. Sand with 320-grit between every coat, wipe with a tack cloth, and allow full dry time between coats regardless of what the label says — in high humidity shops, oil-based products take longer than advertised.
The Live Edge Detail
The underside edge, the contoured natural edge — this gets finish too. Use a foam brush or a small bristle brush to work finish into every crevice. If you left bark on, apply finish carefully with a small artist’s brush to seal the bark surface without drowning it. Bark soaks finish aggressively and can


Stay in the loop
Get the latest classic custom wood furniture updates delivered to your inbox.