
Finishing Pine Without the Blotchy Mess
Pine looks great raw but finishing it can be frustrating. The soft grain absorbs stain unevenly, leaving you with that blotchy mess that makes decent lumber look cheap. I ruined my first few pine projects before figuring out what actually works.
Here’s how to get a clean finish on pine.
The Blotching Problem
Pine has soft, porous early-growth wood and denser late-growth wood. When you apply stain, the soft parts soak it up like a sponge while the dense parts resist it. Result: uneven, blotchy color.
There are two basic approaches to fix this: use a pre-stain conditioner, or skip stain entirely and use a finish that brings out pine’s natural color.
Option 1: Pre-Stain Conditioner
Pre-stain conditioner partially seals the wood before staining. The soft areas don’t absorb as much stain, so color ends up more even.
How to use it:
- Sand to at least 180 grit (220 is better)
- Apply conditioner liberally
- Let it soak for 5-15 minutes per the product directions
- Wipe off excess
- Apply stain within 2 hours (before the conditioner fully cures)
Does it work perfectly? No. But it helps significantly. Commercial brands like Minwax Pre-Stain work fine. For a DIY version, thin shellac or diluted polyurethane achieves similar results.
Option 2: Skip the Stain
Pine actually looks great with a clear finish. A simple oil or poly brings out the grain without fighting against the wood’s nature.
Boiled linseed oil gives a warm, amber tone. Danish oil is similar but easier to apply. Tung oil offers more protection. All of these soak in rather than sitting on top, so they’re forgiving to apply and don’t show brush marks.
Clear polyurethane protects the surface but can yellow over time, which may or may not be what you want.
What Actually Works for Stain
If you’re set on staining pine, gel stains work better than liquid stains. Gel stains sit on top of the wood rather than soaking in, so absorption differences matter less. The color is more controlled.
Apply gel stain with a rag, work in small sections, and wipe off excess quickly. You can build color with multiple coats more predictably than with liquid stain.
Sanding Is Not Optional
Whatever finish you use, pine needs thorough sanding. The soft wood shows scratches easily and they become more visible under finish.
Work through the grits: 120 to remove machine marks, 150 for initial smoothing, 180-220 before finish. Sand with the grain. Check your work with raking light to catch scratches you might miss straight-on.
Sealing and Protecting
After stain (or as your only finish), you need a topcoat for protection. Options:
- Polyurethane: Durable, available in various sheens. Oil-based yellows slightly and takes longer to cure. Water-based stays clearer but can raise grain.
- Wipe-on poly: Easier to apply without brush marks. Takes more coats.
- Lacquer: Dries fast, builds up quickly. Requires good ventilation and some skill.
- Wax: Gives a soft, hand-rubbed look. Less protection but appropriate for some projects.
Apply thin coats. Sand lightly (320 grit) between coats for adhesion. Three thin coats beats one thick coat every time.
The Simple Approach
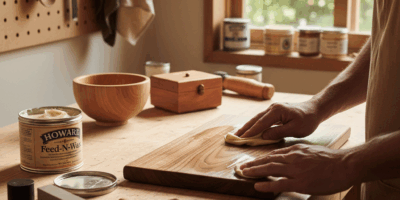
If I’m being honest, my favorite pine finish is just three coats of Danish oil wiped on with a rag. It brings out the grain, adds some warmth, and doesn’t require the fuss of conditioners and topcoats. Not the most protective option, but for many projects, it’s enough.
Pine is forgiving lumber. Don’t overthink it.
Recommended Finishing Products
Watco Danish Oil
Easy to apply, beautiful natural finish for pine and softwoods.
As an Amazon Associate, we earn from qualifying purchases.

Stay in the loop
Get the latest wildlife research and conservation news delivered to your inbox.