You picked a stain color off a swatch card at the hardware store, applied it to your project, and now it looks nothing like the sample. The wood is too dark, the grain is blotchy, and the whole thing looks like a completely different color than what you chose. This happens constantly, and it’s not the stain’s fault — it’s a testing problem.

This article includes affiliate links. We may earn a commission at no extra cost to you.
Why the Color Swatch Doesn’t Match What You Get
Stain manufacturers print their swatches from a single reference wood — usually a clean piece of white oak or birch. Your project is almost certainly a different species, with different grain density, different pore structure, and different natural color. Oak absorbs stain deep into its open grain and produces a pronounced, dark result. Maple has tight, uniform grain that resists penetration and is prone to blotching. Cherry has natural red-pink undertones that fight certain stain colors. Pine soaks stain unevenly along its soft grain lines.
The swatch is a starting point, not a prediction. Treating it as a guarantee is the single most common stain selection mistake.
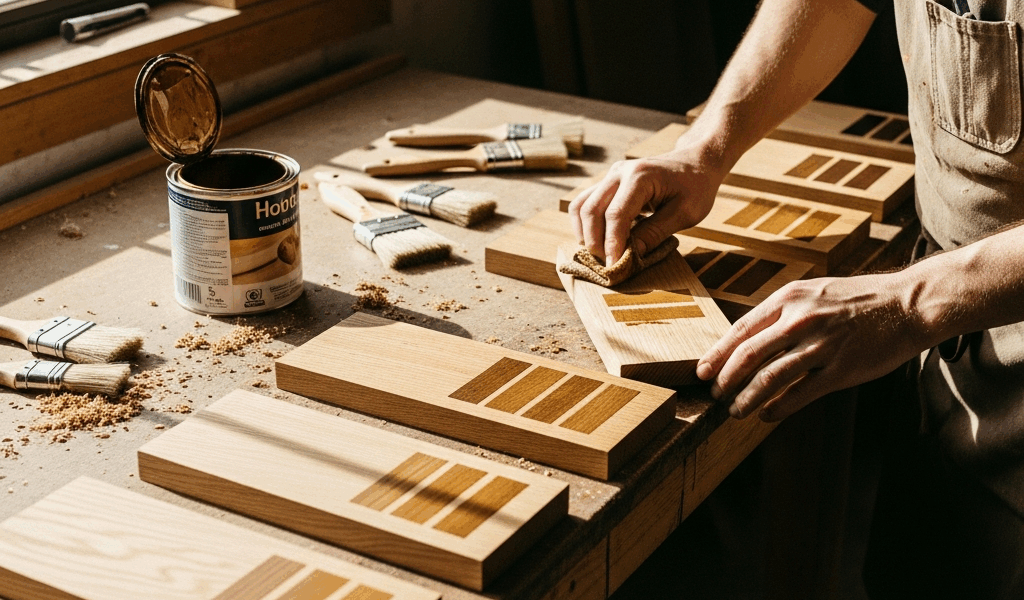
How to Test Stain on Your Wood Species
Cut a scrap piece from the same board you’re using for the project — or at minimum, the same species from the same lumber yard. Sand it to the same grit you’ll use on the final piece (180 or 220 grit is standard for most furniture). Apply the stain exactly as you plan to on the project: same number of coats, same wipe time, same application method.
Let it dry completely — stain color shifts as it dries, especially oil-based formulas that lighten by 10-20% from wet to dry. Look at the test piece under the actual lighting where the finished project will live. Incandescent light, LED, and natural daylight all read stain color differently.
This test takes 30 minutes and saves days of regret. Do it for every stain color you’re considering. I keep a reference board in my shop with labeled test patches — it’s become the most useful scrap piece I own.
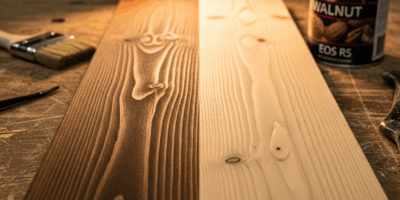
How Different Wood Species Respond to Stain
Oak: Open grain drinks stain deeply. Colors come out dark and pronounced with strong grain contrast. Oak is the most forgiving species for stain application — it’s hard to mess up. The grain pattern does all the work.
Walnut: Already carries a beautiful natural chocolate-brown color. Dark stain muddies it. Most walnut furniture looks best with a clear finish or the lightest possible tint to even out sapwood streaks. If you’re staining walnut dark, reconsider.
Cherry: Usually better without any stain at all. Cherry develops a rich reddish-brown patina naturally over 6-12 months of sunlight exposure. Stain fights this natural color development. A clear oil finish or shellac lets the wood do what it already wants to do.
Maple: Tight, uniform grain that resists stain penetration. Notorious for blotching — some areas absorb more stain than others, creating a mottled appearance. Apply a pre-stain wood conditioner before staining, or use gel stain, which sits on the surface rather than penetrating unevenly.
Pine: The most challenging species to stain evenly. Soft grain absorbs stain aggressively while hard grain resists it, creating a zebra-stripe effect. Pre-stain conditioner is mandatory. Gel stain also works well on pine for consistent color.
Choosing Between Warm and Cool Tones
Warm stains (Golden Oak, Early American, Provincial, Ipswich Pine) emphasize red-brown undertones. They work with warm room decor — wood floors, warm-white walls, traditional or craftsman interiors. Most classic furniture finishes fall in this category.
Cool stains (Classic Gray, Weathered Oak, Ebony) produce gray-brown or near-black finishes with minimal warmth. They suit modern, Scandinavian, or industrial interiors with cool-neutral walls and metal accents.
Match the stain temperature to the room, not to your mood at the hardware store. A warm Provincial stain on a bookshelf will fight a room full of cool gray walls and chrome fixtures. Test under the room’s actual lighting before committing.
Application Details That Change the Final Color
Two factors that most people overlook can shift the final color dramatically:
Number of coats. One coat versus two coats can differ by 50% in darkness on the same wood. Always test your sample to the same number of coats you’ll use on the project. If you’re planning two coats, test two coats.
Topcoat choice. Oil-based polyurethane adds amber warmth to any stain — it shifts cool stains warmer and makes warm stains richer. Water-based polyurethane dries clear with no color shift. If you’re using oil-based poly over a cool gray stain, you’ll end up with a warmer, more golden result than you expected. Apply your intended topcoat to the test piece too. The test isn’t done until the full finish stack is on the scrap.


Stay in the loop
Get the latest classic custom wood furniture updates delivered to your inbox.